Harry Potter party decorations do not need a castle, a budget or a garage full of props. They need a normal house with its rooms used on purpose: the dining room is the Great Hall, the hallway is the portrait corridor, a doorway is Platform 9¾, the kitchen island is the potions bar, a sunny windowsill is Herbology. This post is eleven of those zones, each with what to buy, what to make and the steps, plus the one decoration that does more than all the others together: floating candles, which cost about a dollar each to make and take an afternoon.
Everything is sourced from the party aisle, the dollar store, the craft store and the recycling bin. Pick three zones for a birthday party, five for a Halloween open house; nobody has ever decorated all eleven, and the table below says what each one costs in money and time so you can choose.
The eleven zones at a glance
| # | zone | where in the house | cost | time |
|---|---|---|---|---|
| — | DIY floating candles | over any table | $10–15 for a dozen | an afternoon |
| 1 | Great Hall feast | the dining table | $25 | 2 hours, plus the candles |
| 2 | Portrait corridor | the hallway or stairs | $20 | 2 hours |
| 3 | Herbology greenhouse | a sunny windowsill or kitchen corner | $15 | 1 hour |
| 4 | Ollivanders wand shop | a bookshelf | $10 | 2 hours, most of it wands |
| 5 | Platform 9¾ | any interior doorway | $15 | 30 minutes |
| 6 | Quidditch snack bar | a table or the kitchen island | $20 | 1 hour |
| 7 | Forbidden Forest corner | a dark corner | $15 | 1 hour |
| 8 | Honeydukes counter | a sideboard or coffee table | the candy | 1 hour |
| 9 | Potions bar | the kitchen island | $15 | 1 hour |
| 10 | Divination tower | a small table and two chairs | $5 | 30 minutes |
| 11 | Defence Against the Dark Arts wall | a blank wall or the back of a door | $10 | 1 hour |
Before you start
- One palette, four accents. Kraft brown, black and candle gold are the base for every zone; the house colours come in as napkins, banners and candy, never as paint. Two house colours in a room look intentional; four look like a party store.
- Battery lights everywhere. LED tea lights, LED tapers, warm-white fairy lights. Real flames near paper, fabric and children are the one thing this post says no to.
- Command hooks and fishing line. Nothing here goes into a wall with a nail; renters can do all of it and take it down on Sunday.
- Print everything you can. Crests, signs, labels, wanted posters, the Platform 9¾ sign: a home printer, matte paper, and a cup of black tea to age the parchment.
- The order of work. Floating candles and wands the weekend before; walls, doorways and the corridor the day before; tables, food zones and lights the morning of.
The floating candles, first
The floating candles are the Harry Potter decoration. A dozen of them over the dining table, at different heights, with the ceiling light off, do more for the room than everything else here combined, and they are made from the cardboard tubes in your recycling bin.
DIY floating candles
Makes 12 An afternoon, plus dryingWhat you need
- 12 cardboard tubes: toilet-paper rolls, or paper-towel rolls cut in half
- Hot glue gun and glue sticks
- White spray paint, or white acrylic and a brush
- 12 battery tea lights (flickering ones look best)
- Clear fishing line
- Clear Command hooks or clear push pins for the ceiling
- Optional: a strip of white paper to close the bottoms
Steps
- Cut the tubes to different lengths, 4 to 6 inches, so the candles hang at different heights.
- Run hot glue around the top rim and let it drip down the sides an inch or two for the wax; two or three drips per candle, not a full coat.
- Paint the tubes white, drips and all. Two thin coats of spray paint, or one coat of acrylic, and let them dry.
- Close the bottom of each tube with a circle of white paper glued inside, so the tea light sits in it and does not fall through.
- Punch two small holes opposite each other just under the rim; thread a length of fishing line through and knot it.
- Drop a battery tea light in each, flame up; hang from clear hooks in a staggered pattern over the table, the lowest about seven feet up so nobody stands up into one.
Tip: hang them in the afternoon and switch the tea lights on at the door; a flickering tea light runs 20 hours or more on its battery, so there is no reason to turn them off before the guests arrive.
Twelve is enough over a dining table; twenty-four across a living room ceiling is the full Great Hall. They pack flat in a shoebox and come out again next year, which is more than can be said for a balloon.
1. The Great Hall feast
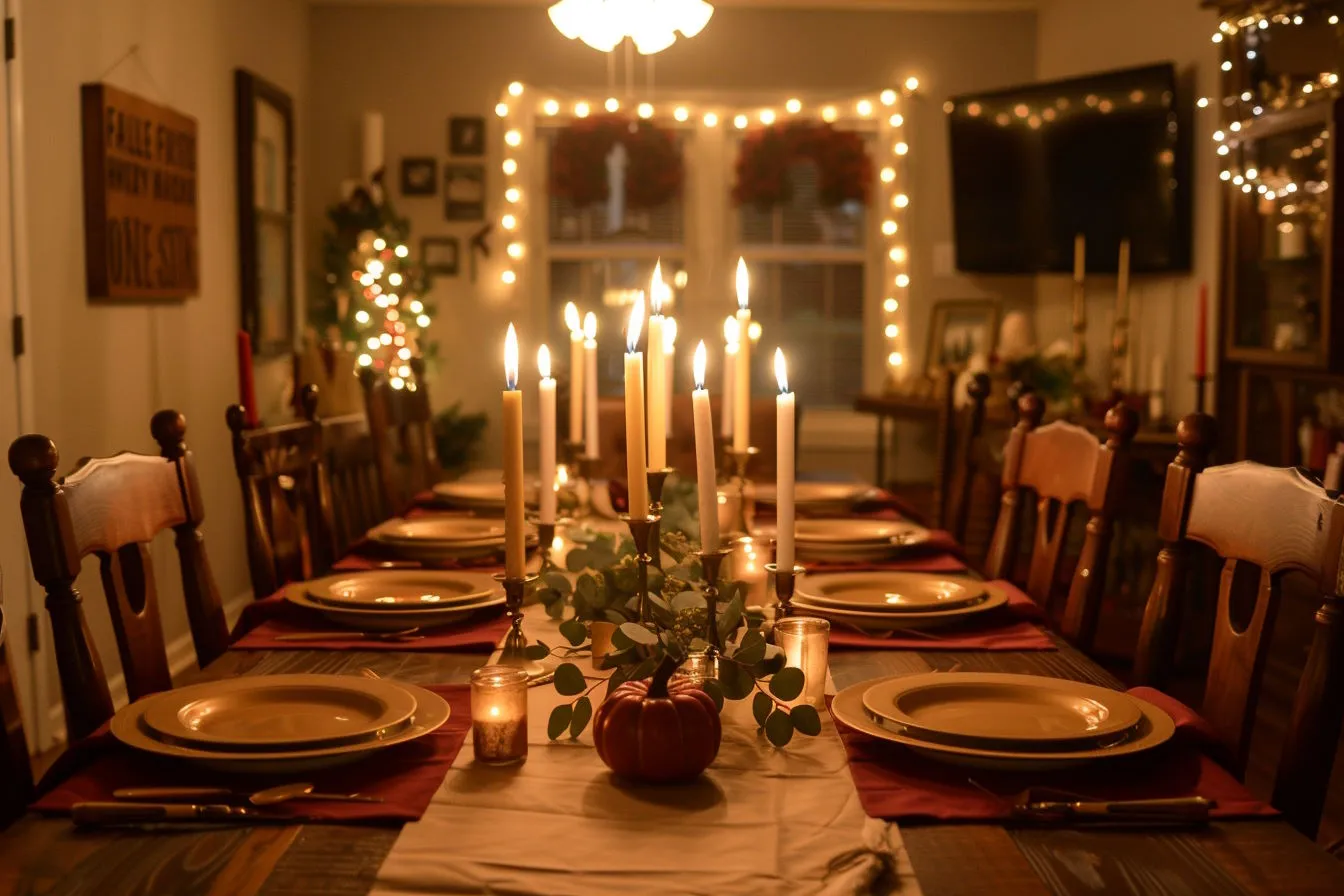
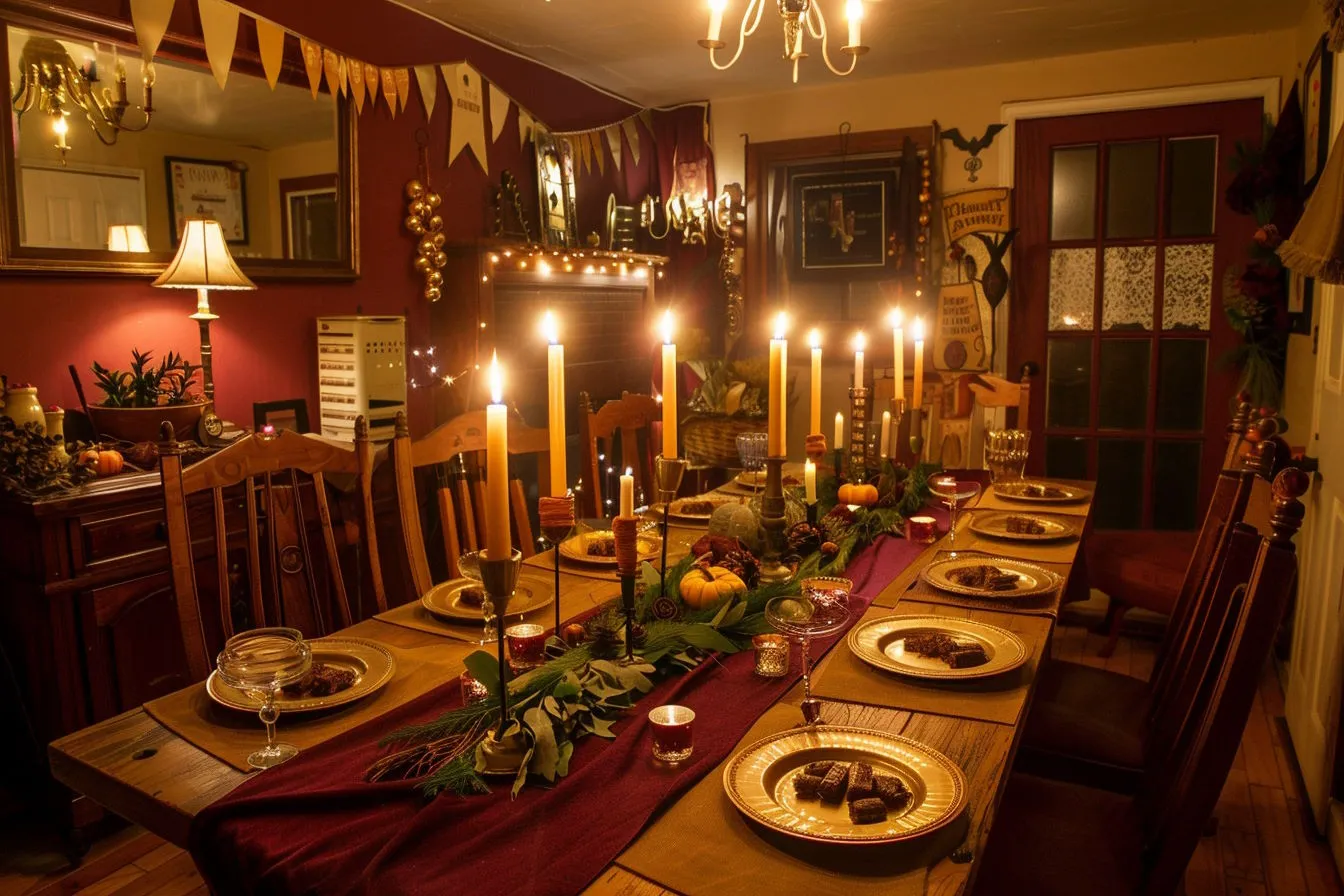
The dining room as a wizard-school supper: two tables pushed together under kraft paper for the banquet wood, one house colour in the napkins, candle holders down the middle, the floating candles above, and crests on the wall behind the head of the table. With the ceiling light off and one lamp on in a corner, it reads as the Great Hall from the doorway, and it is the room where the birthday cake lands.
Keep the palette tight: brown paper, gold-rim plates from the party aisle, and one or two house colours you already own. The money goes on the candles; everything else on this table is something you have.
The Great Hall feast
Seats 8–12 2 hoursWhat you need
- Two tables pushed together (a dining table and a folding table)
- A roll of brown kraft paper, taped underneath
- Cloth or paper napkins in one or two house colours
- The DIY floating candles, and 4–6 candle holders with LED tapers
- Gold-rim plastic plates and goblets from the party aisle
- Printed house crests on coloured card "shields"
- Mini pumpkins, gourds or eucalyptus for the centre
- A brown bedsheet or a faux-brick plastic tablecloth for the wall, optional
Steps
- Push the tables together and tape kraft paper over them, folding a 2-inch overhang under like a fitted sheet; hide the seam under a strip of coloured fabric as a runner.
- Set each place: gold-rim plate, house-colour napkin, goblet, and a name on a folded kraft-paper scroll.
- Down the centre, repeat every two feet: a candle holder, two or three mini pumpkins, a sprig of greenery with fairy lights woven through.
- Tape the printed crests to card shields and stick them to the wall behind the head of the table; hang the brown sheet or brick tablecloth first if the wall is bright.
- Hang the floating candles over the table; lower the blinds, switch off the ceiling light, leave one warm lamp on.
2. The portrait corridor
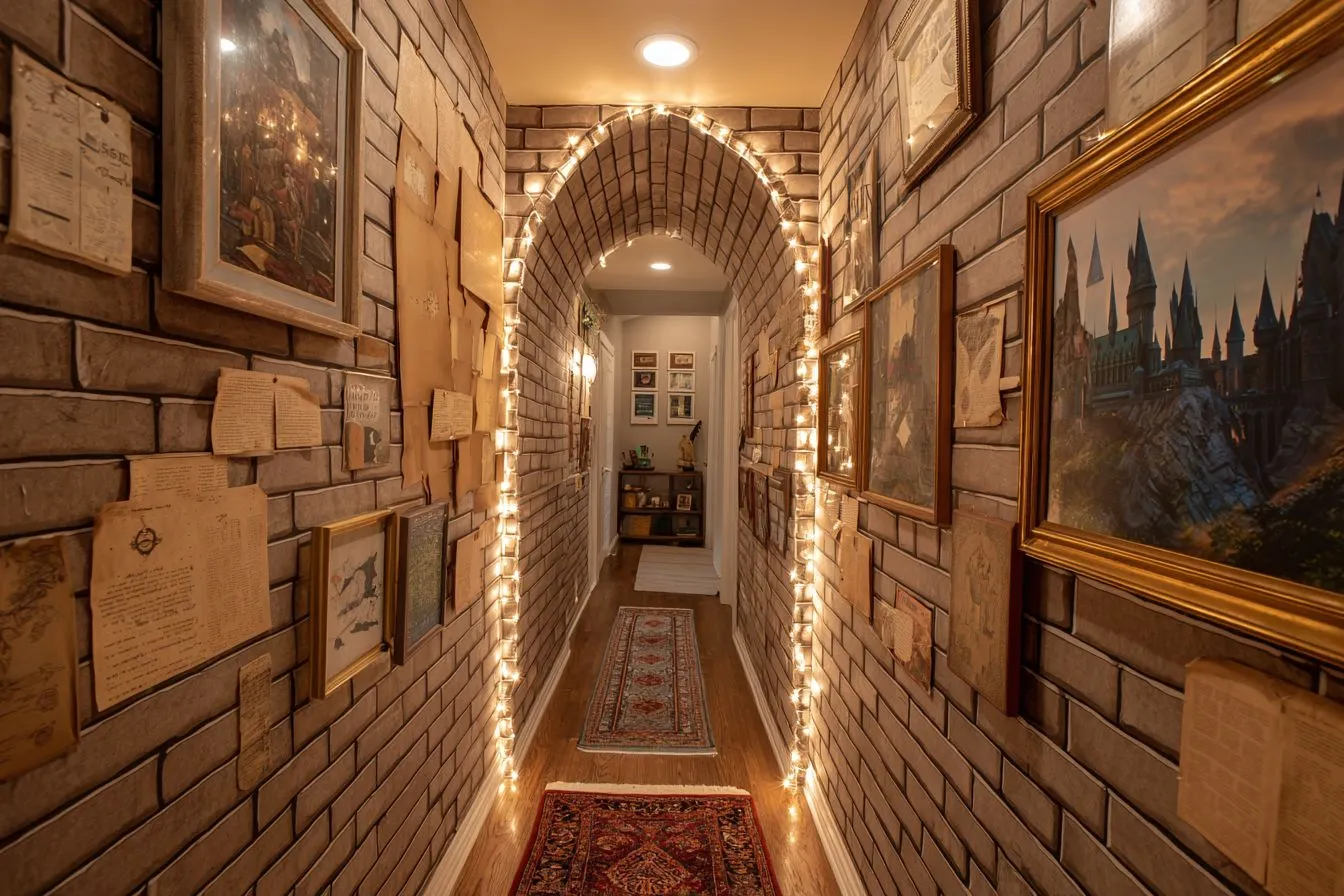
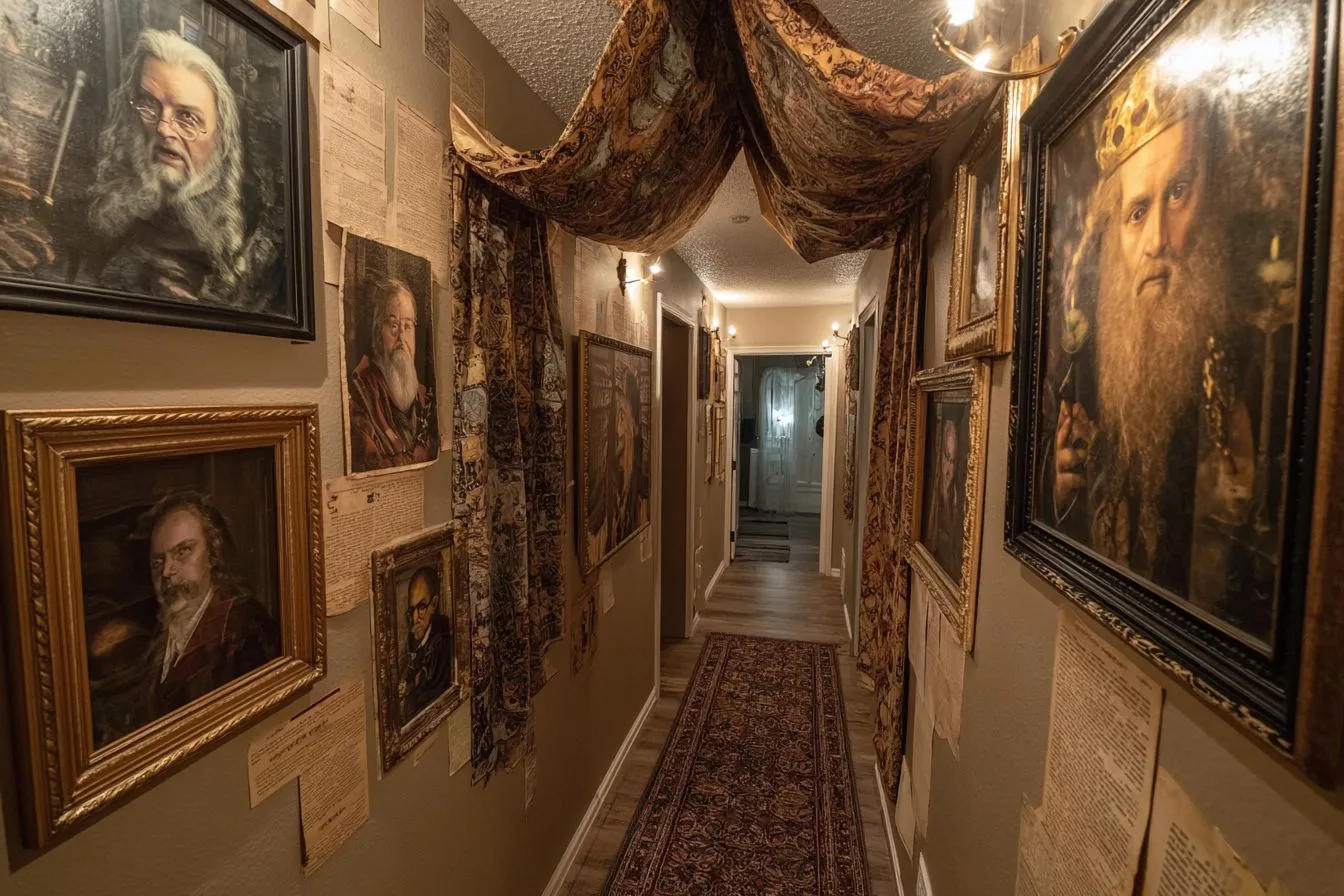
A hallway, a foyer or a stair landing becomes the moving-portrait corridor: a cluster of mismatched thrift-store frames sprayed gold and bronze, a brick-print tablecloth over the far doorway for the arch, an LED strip above the frames pointing down, and one frame with an old phone behind it looping a silent GIF of a portrait that blinks. Children stop at that frame; adults stop at the “Lost Toad” notice.
The whole thing is two layers of light: the strip above the frames and one dim lamp at the far end. Everything else is off.
The portrait corridor
One hallway 2 hoursWhat you need
- 6–10 thrift-store frames, 5×7 to 11×14, and gold and bronze spray paint
- A brick-print plastic tablecloth or fabric panel for the doorway
- A printed "Welcome to Hogwarts" arch sign
- Black card for the portrait blanks, or printed portraits
- An old phone or tablet with a looping silent portrait GIF, for one frame
- A 6-foot warm-white LED strip or two battery puck lights
- Command strips
- Tea-stained notices: "Lost Toad", "Quidditch Try-outs"
Steps
- Hang the brick tablecloth over the far doorframe with Command hooks; cut a T-slit up the middle so guests walk through it; tape the arch sign across the top.
- Spray the frames gold and bronze; take the glass out of the one that gets the phone.
- Lay the frames out on the floor in a cluster first, then stick them to the wall at eye level with Command strips.
- Wedge the phone behind the open frame at a slight upward angle, brightness at half, charger cable hidden along the skirting.
- Stick the LED strip along the top of the frame group pointing down; kill the ceiling light; set one dim lamp at the far end.
- Tack the notices at eye level and lay the runner.
3. The Herbology greenhouse
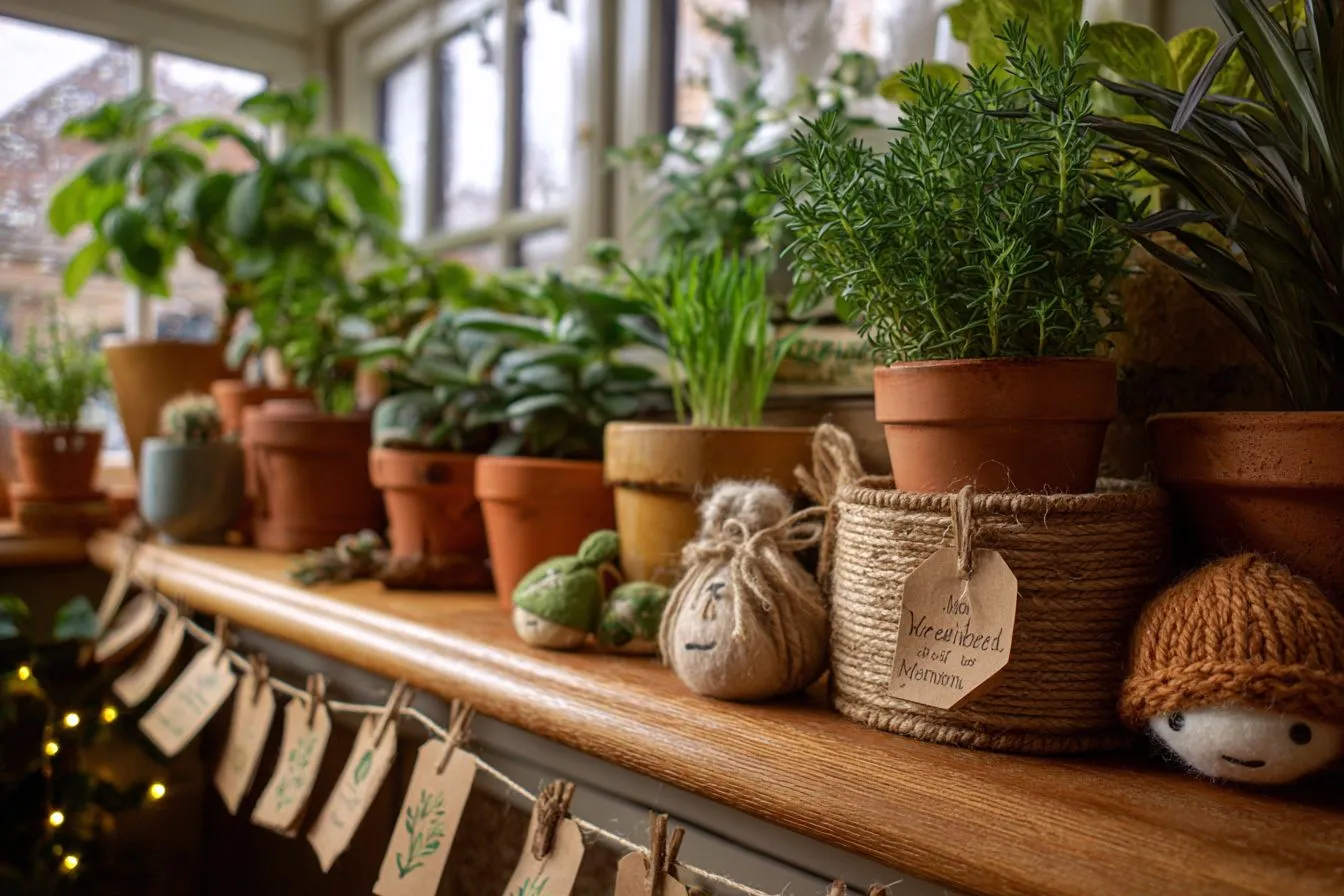
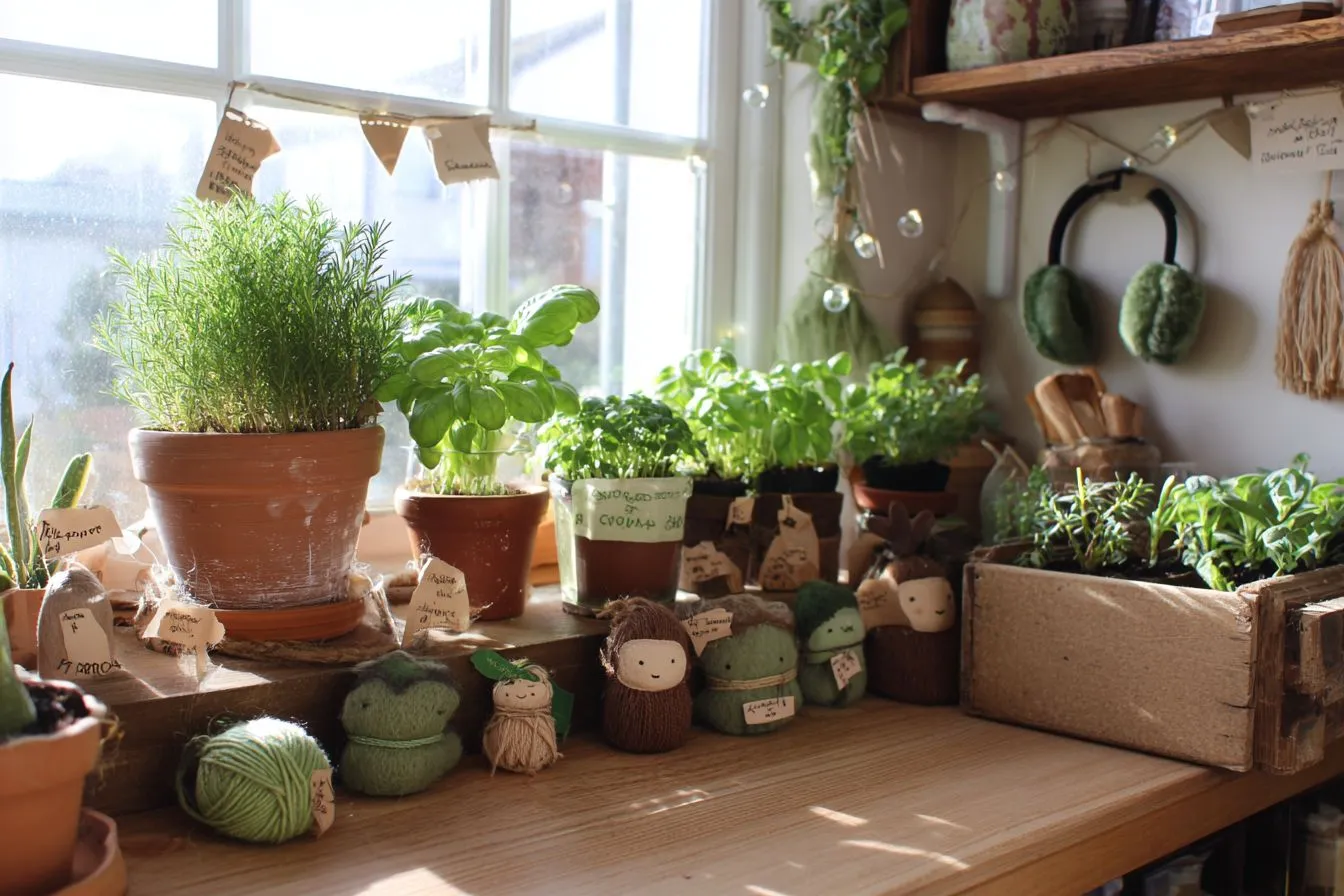
The plants you already have, moved to the sunniest windowsill or kitchen corner, with kraft tags in fake Latin, a pair of earmuffs on a hook “for repotting”, and one mandrake: a brown sock stuffed with paper, felt eyes, yarn roots, half buried in a pot. It is the cheapest zone here and the one children play with longest, because the mandrake gets pulled out of its pot every ten minutes.
Use crates and stacks of books for height, tallest plants at the back, and green fairy lights through the pots for an evening party.
The Herbology greenhouse
One windowsill 1 hourWhat you need
- Potted herbs and houseplants, real or faux, in clay pots or tin buckets
- A brown sock or old tights, paper for stuffing, felt and yarn for the mandrake
- Kraft tags, twine and mini clothespins
- A cheap pair of earmuffs and a hook
- A wooden crate or a stack of books for height
- Green battery fairy lights
Steps
- Pick the sunniest spot; arrange the plants tallest at the back, on crates and books for levels.
- Stuff the sock with paper, glue on felt eyes and yarn roots, and bury it to the shoulders in a pot of soil or shredded brown paper.
- Write the tags — Mandragora, Venomous Tentacula, Devil's Snare, the child's name — and clip them to twine strung between two pots.
- Hang the earmuffs on a hook with a note: "Required for repotting."
- Wind the fairy lights through the pots and tuck the battery pack behind the tallest plant.
4. Ollivanders wand shop
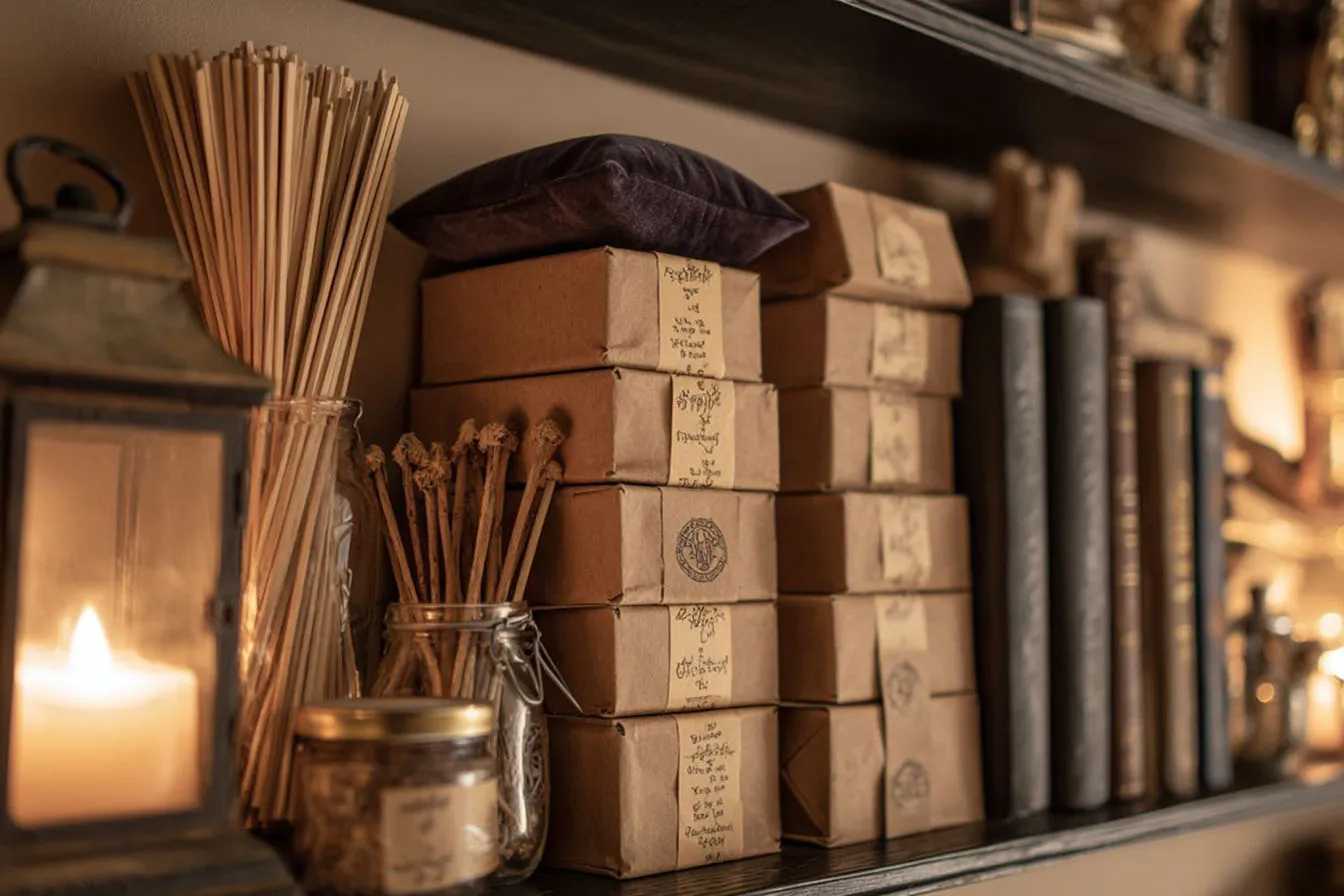
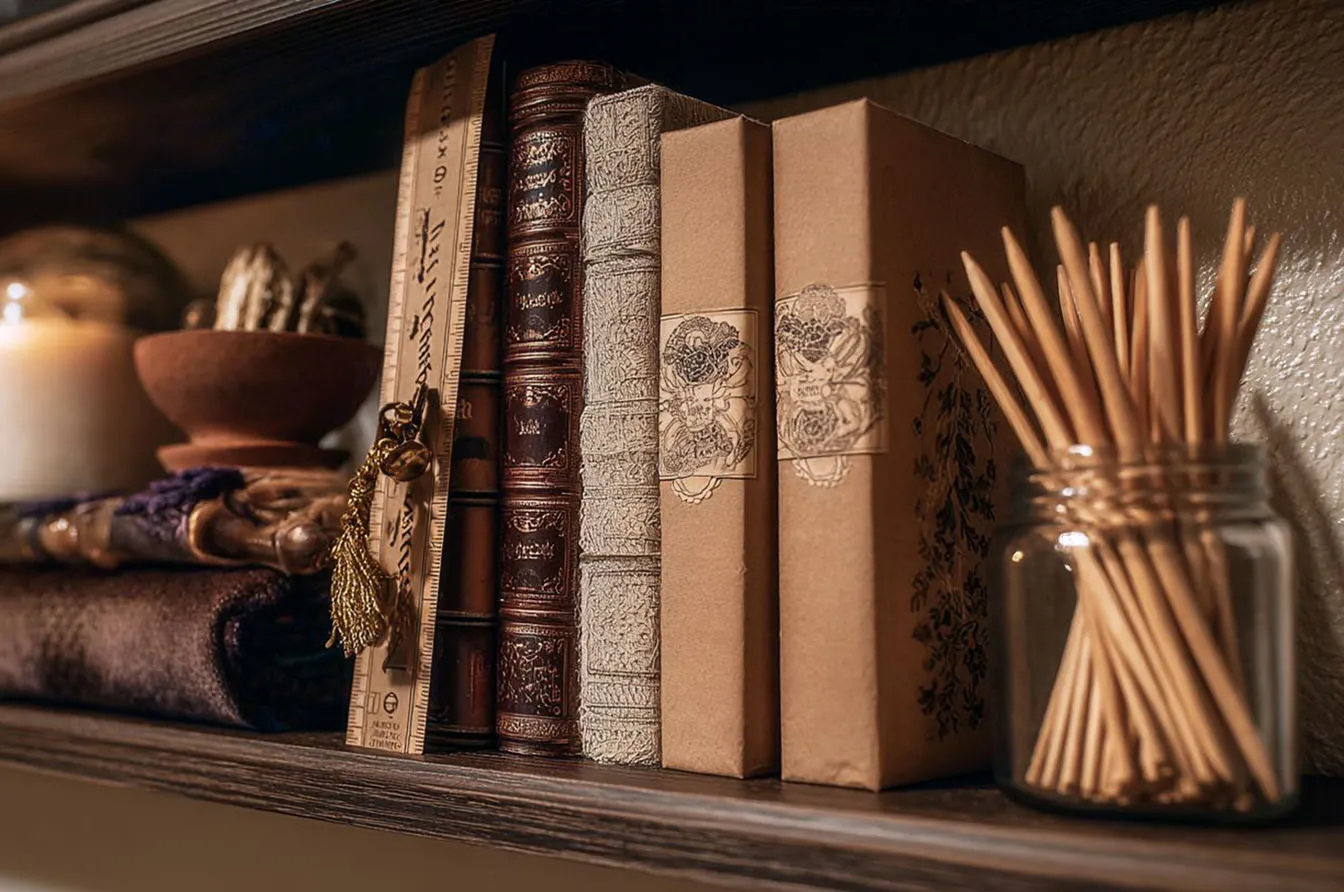
One bookshelf cleared and refilled with long narrow boxes wrapped in kraft paper, stacked unevenly, each with an ivory label in a spidery hand (“Dragon heartstring, 14¼ inches, unyielding”), a jar of chopstick wands, a velvet cushion with the hero wand under a clip lamp, and a measuring tape hanging off the shelf edge. The wands are the party favour, so this zone makes itself useful: every guest leaves with one.
The wands are the time: hot glue for the grip texture, layered brown and black paint, a metallic dry-brush. A chopstick and ten minutes each.
Ollivanders wand shop
One bookshelf 2 hours, most of it wandsWhat you need
- Empty long narrow boxes (jewellery boxes, toothpaste boxes) and kraft paper
- Ivory label stickers and a fine pen
- Chopsticks or wooden dowels, one per guest
- Hot glue, acrylic paint in browns, black and a metallic
- A velvet scrap over a small cushion
- A measuring tape, a clip lamp or LED puck light
- A printed "Ollivanders" sign on aged paper
Steps
- Wrap the boxes in kraft paper, label them with wood, core and length, and stack them unevenly on two or three shelves.
- Run hot glue in rings and spirals around the grip end of each chopstick; paint in layered browns and black; dry-brush a little metallic on the grip.
- Stand the wands upright in a jar, and lay the fanciest one across the velvet cushion under the lamp.
- Hang the measuring tape from the shelf edge and tape the sign to the top of the unit.
- Fairy lights along the back of the shelf for fill; the lamp does the drama.
5. Platform 9¾
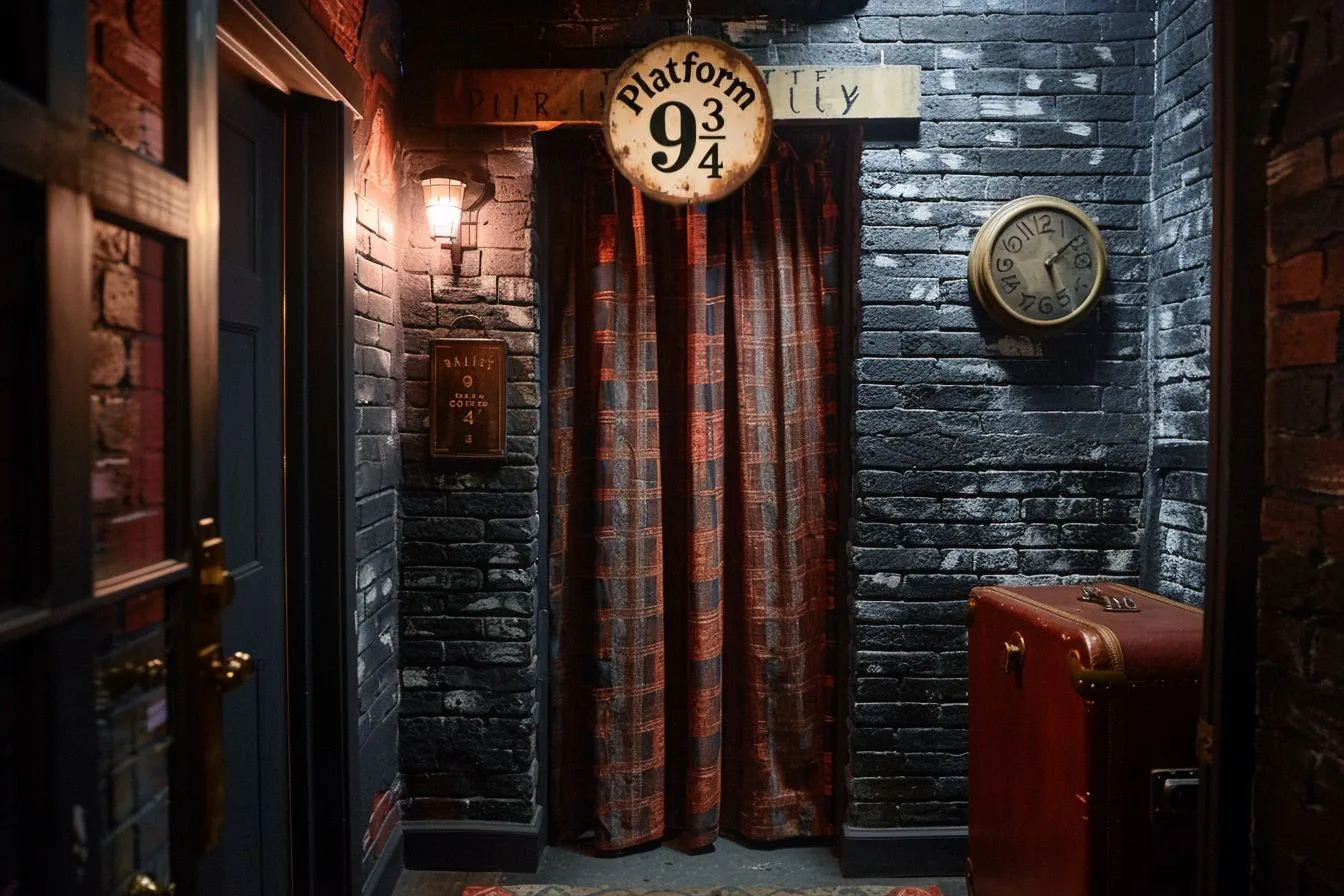
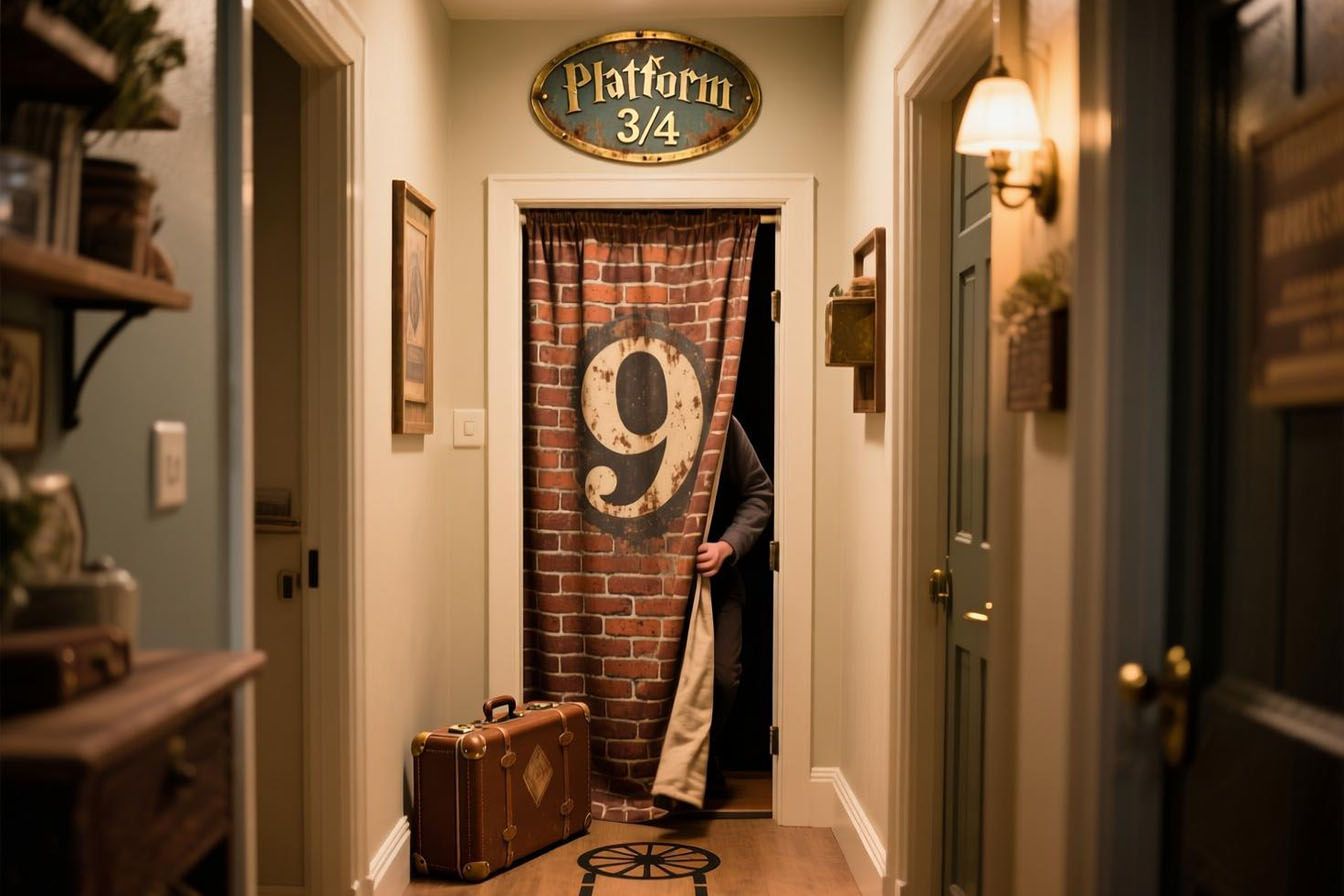
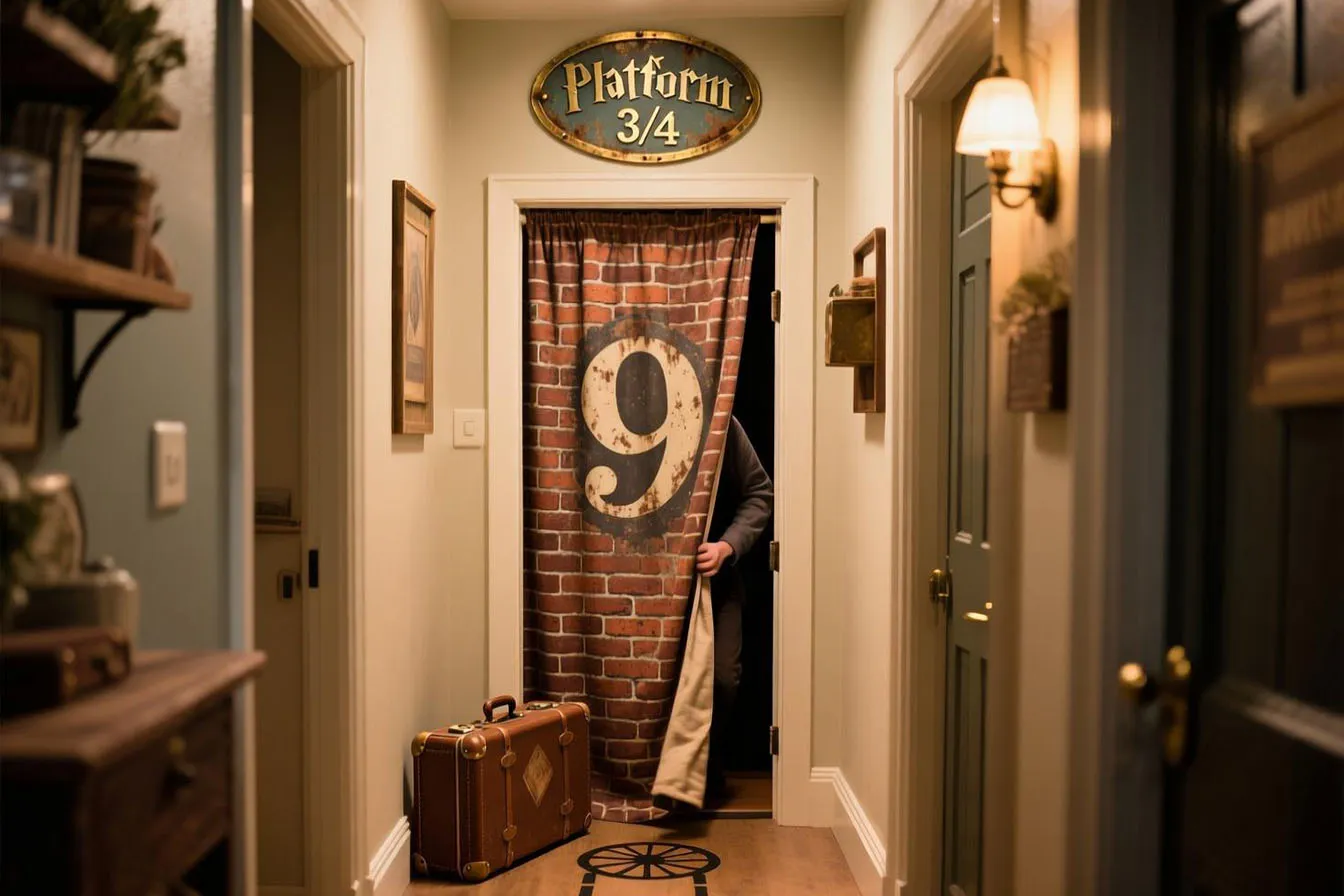
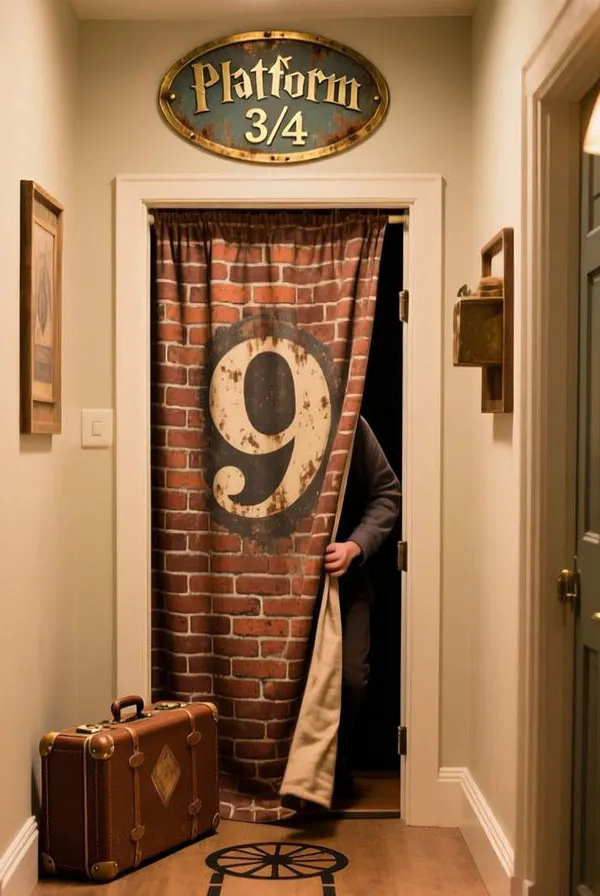
Any interior doorway: a brick-print plastic tablecloth hung from Command hooks, slit up the middle so guests push through it, the round Platform 9¾ sign above, and an old suitcase wedged half through the slit as if someone is mid-barrier. It takes thirty minutes, costs less than the pizza, and it is the photo every guest takes on the way in. Keep the doorway well lit for those photos; this is the one zone that does not want candlelight.
The sign is a free printable glued to foam board; the suitcase is the attic’s, or a cardboard box painted brown with paper straps.
Platform 9¾
One doorway 30 minutesWhat you need
- A brick-print plastic tablecloth or fabric panel, 54×108 inches covers a door
- A printed round "Platform 9¾" sign, glued to foam board
- An old suitcase, or a cardboard box painted brown
- Command hooks and duct tape
- Optional: printed trolley wheels on foam board
- A phone on a tripod for the running-through photos
Steps
- Stick Command hooks above the doorframe and hang the brick sheet so it covers the doorway edge to edge.
- Cut a slit from the bottom to within 2 inches of the top so it parts when someone walks through.
- Hang the sign above the centre with double-sided tape.
- Set the suitcase so it looks halfway through the slit; duct-tape it to the frame from behind so it stays put.
- Trim the sheet so nobody trips; put the phone on the tripod; tell guests to run at it, but not at full speed.
6. The Quidditch snack bar
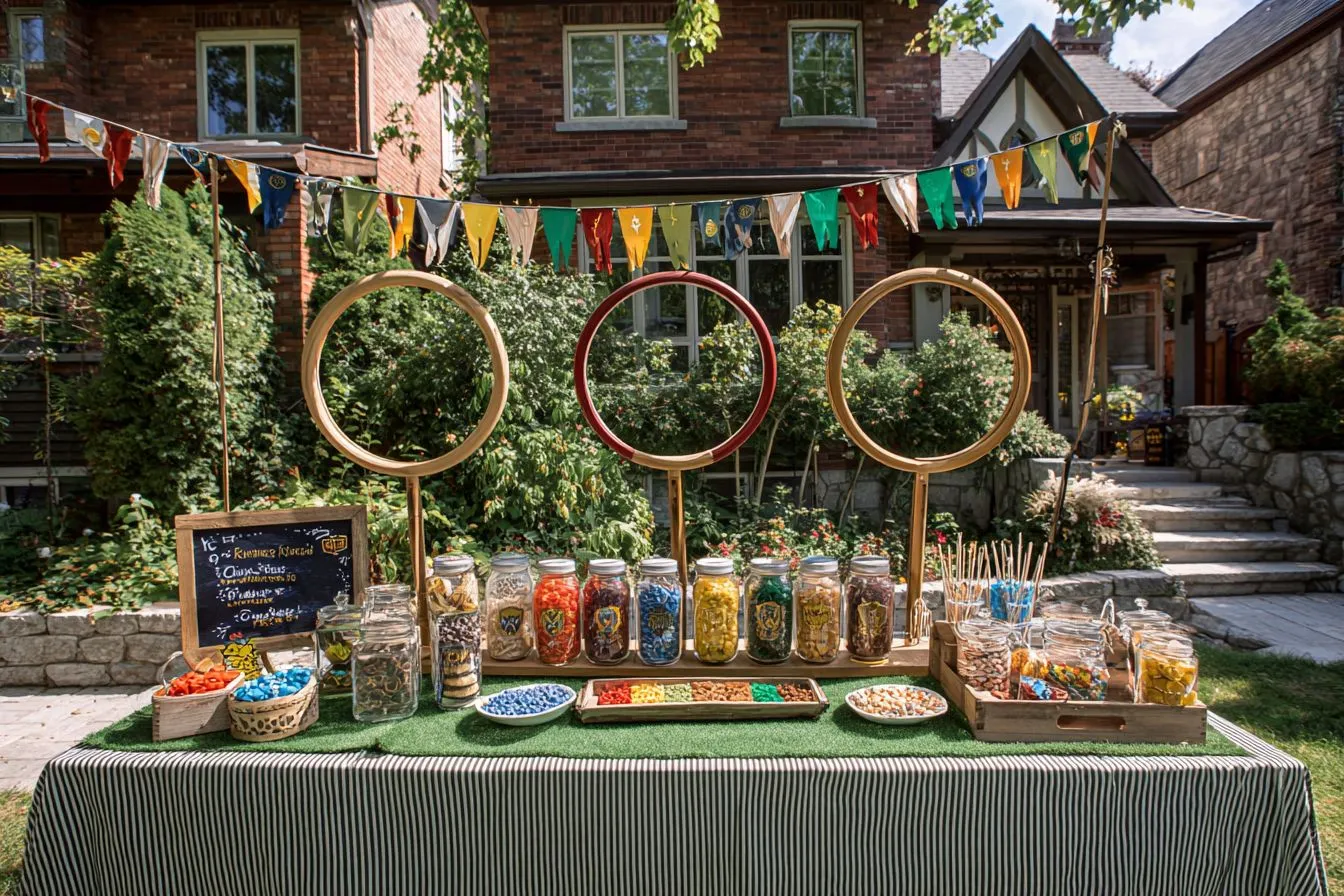
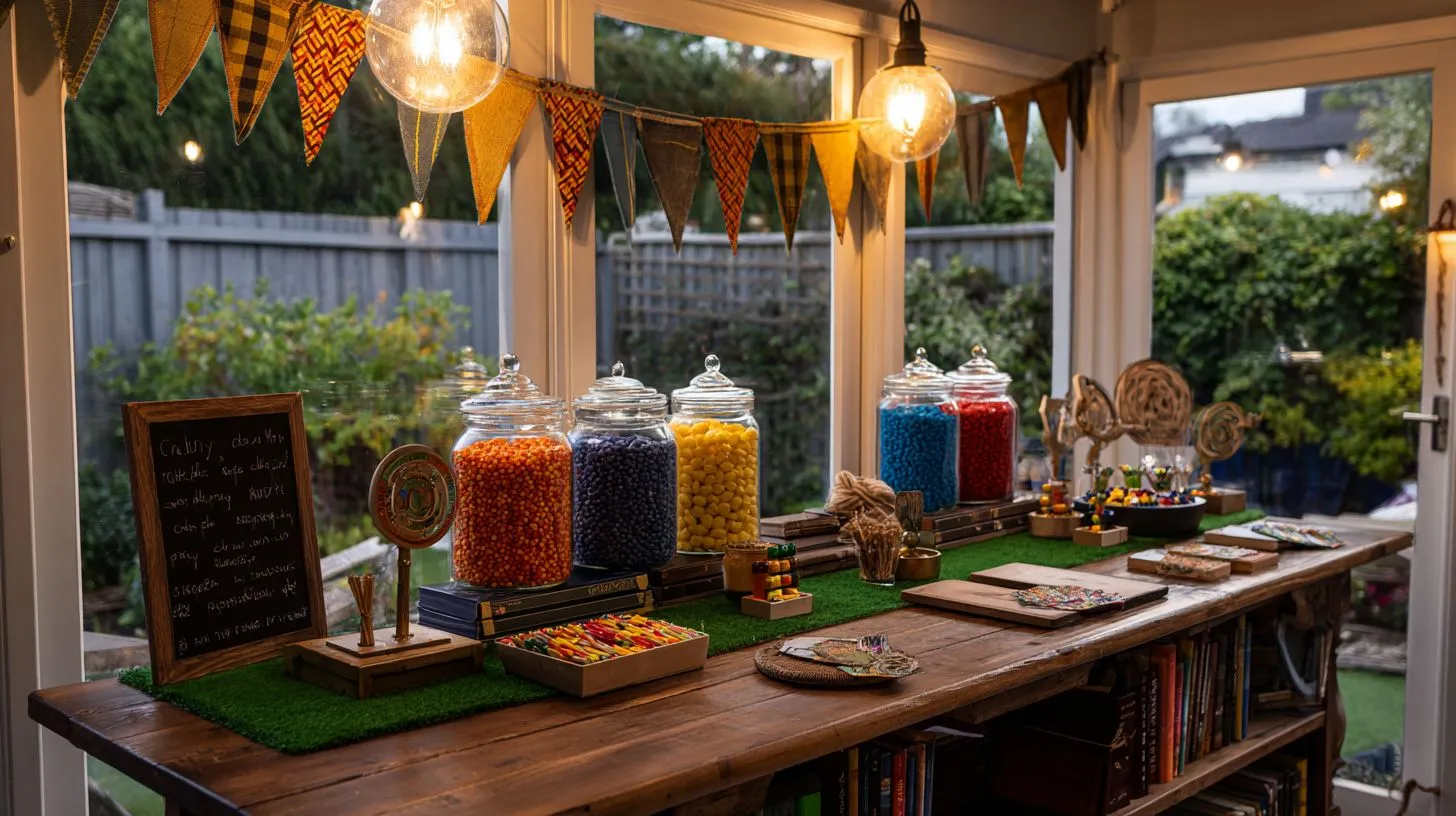
A table or the kitchen island under a green felt runner, three hula hoops sprayed gold on dowels in buckets of sand for the goals, snacks in the four house colours in clear jars, a chalkboard menu (“Seeker’s fuel”, “Beater’s mix”), pennant bunting across the front and a foam ball for throwing through the hoops between handfuls. It is the bright, daylight zone of the party, so put it where the light is.
Assign one colour per house — red jelly beans, green grapes, blue candy, yellow popcorn — and label the jars with printed crests; the sorting does itself.
The Quidditch snack bar
One table 1 hourWhat you need
- Green felt, a turf runner or an artificial-grass doormat
- Three hula hoops, gold spray paint, three dowels and buckets of sand
- Clear jars and bowls, and snacks in the four house colours
- Printed crest labels, a small chalkboard
- Felt or paper pennant bunting in the four colours
- Twig-and-twine mini brooms, a foam ball, a couple of plastic trophies sprayed gold
Steps
- Cover the table with the green runner and stand the three gold hoops on dowels at one end, in the sand buckets.
- Fill the jars one colour per house and label them with the crests.
- Write the menu on the chalkboard in the centre.
- Lay the mini brooms among the jars and the foam ball by the hoops.
- Hang the pennants across the front edge and set a trophy at each end.
7. The Forbidden Forest corner
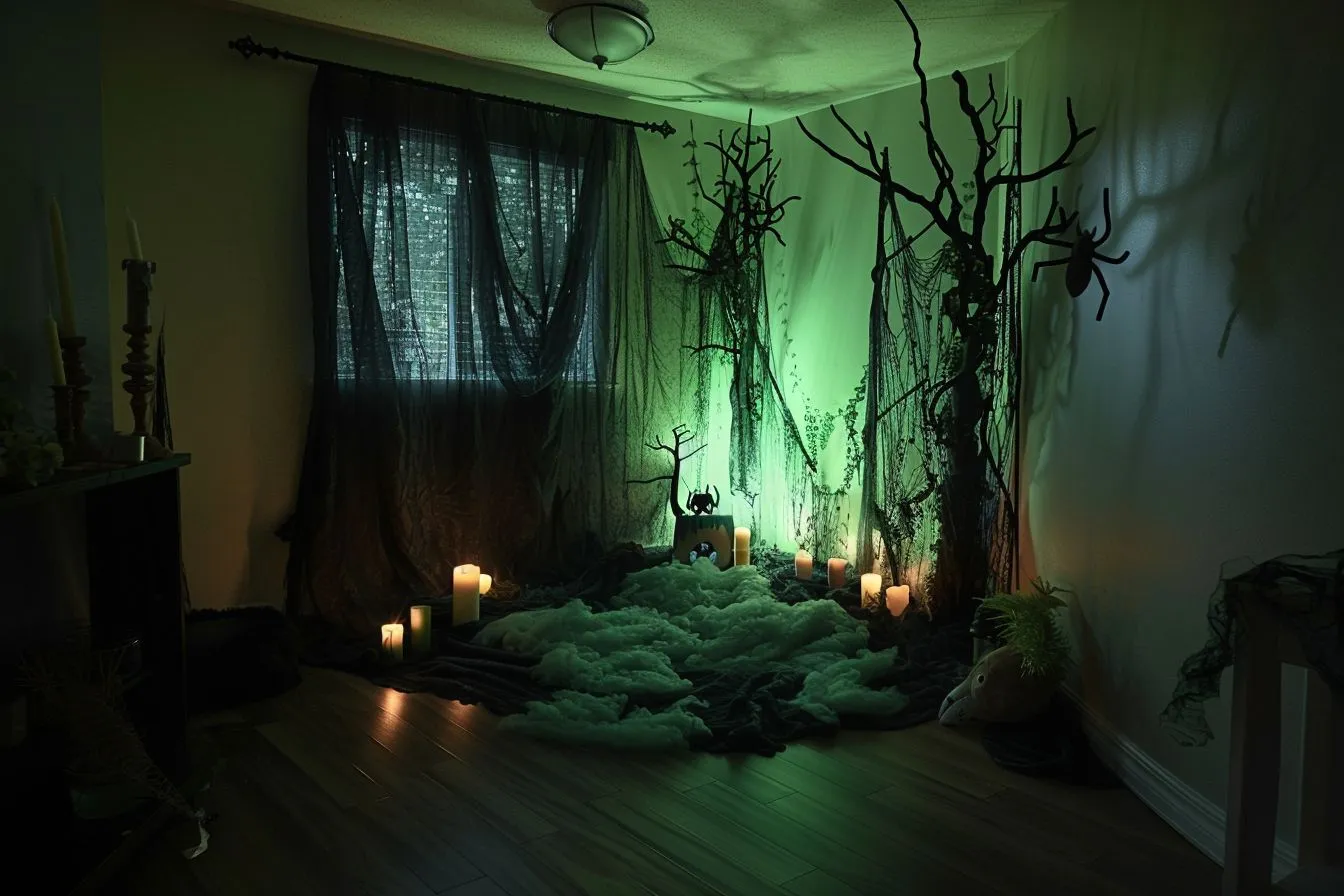
The darkest corner of the living room, behind the sofa or under the stairs: bare branches from the yard sprayed dark, dark fabric draped over chairs behind them for the tree line, LED candles hidden at the base, a stretch of spider web, one plush spider hanging low enough to notice, and cardboard creature silhouettes half hidden in the branches. A mist maker in a bowl on the floor is optional and worth it.
Less light is more here: two or three LED candles and a sparse string of fairy lights. If you can see the whole corner, it is too bright.
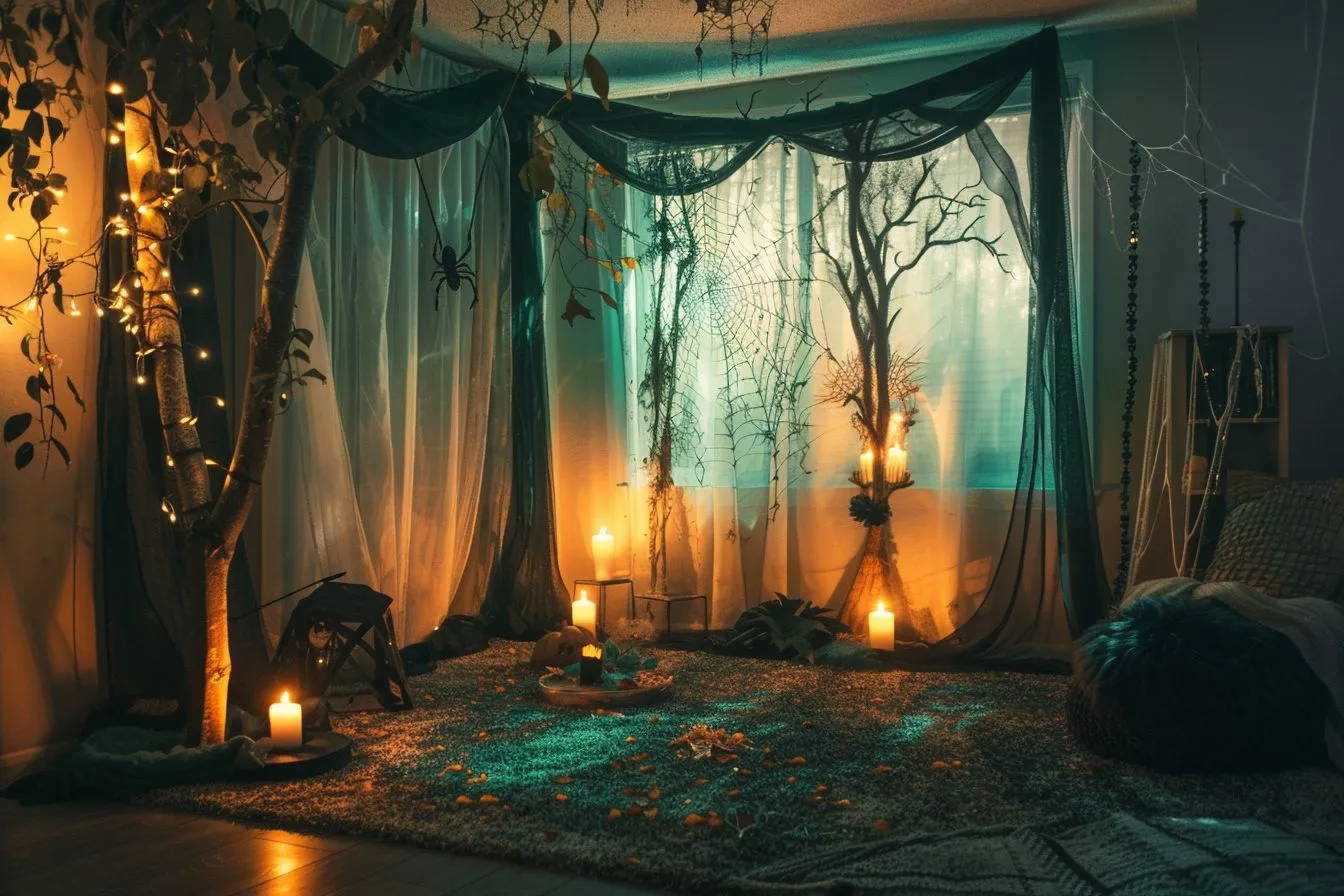
The Forbidden Forest corner
One corner 1 hourWhat you need
- Tall branches from the yard or artificial plants, dark spray paint
- Dark green or black fabric or tablecloths
- LED candles and warm fairy lights
- Stretch spider webs from the Halloween aisle, a plush spider or bat, fishing line
- Black card for creature silhouettes: a centaur, a unicorn, a stag
- Optional: a small mist maker in a cauldron or bowl
Steps
- Stand the branches along two sides of the corner and drape the dark fabric behind them to block the wall.
- Hide LED candles at the base of the branches; weave a few fairy lights through, sparingly.
- Stretch the webs between branches and hang the spider on fishing line so it just dips into view.
- Cut the silhouettes and prop them half hidden in the foliage.
- Set the mist maker on the floor in its bowl; play forest-at-night sounds low.
8. The Honeydukes counter
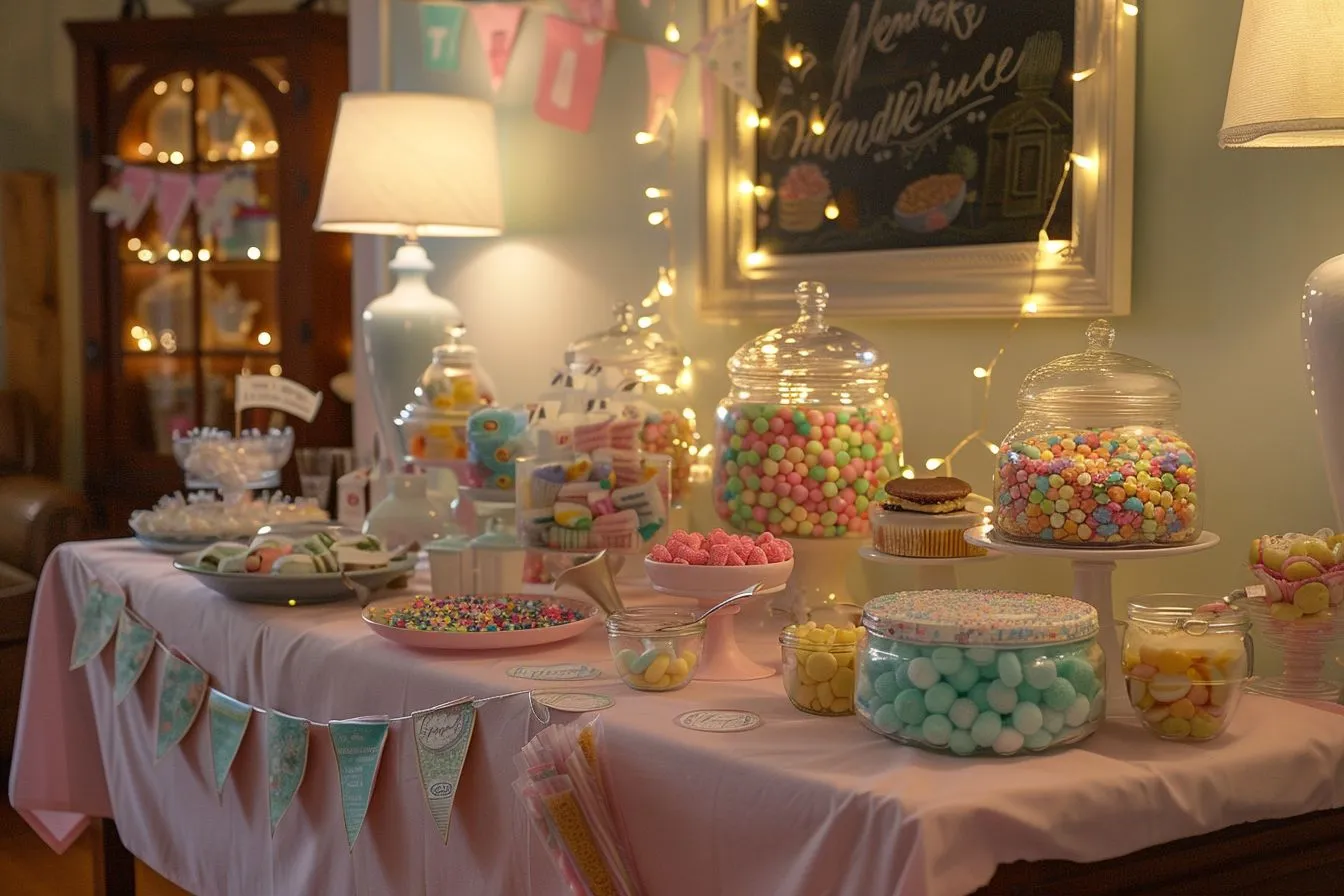
A sideboard or coffee table under pastel paper, glass jars of candy at three heights, printed Honeydukes labels (“Fizzing Whizzbees”, “Acid Pops”, “Sherbet Lemons”), tongs and scoops, cellophane bags with ties so guests fill their own, and pastel bunting across the front. It is the bright, sweet corner of the party and the favour table in one; the Harry Potter snacks made at home go on the same counter, on plates between the jars.
Tallest jars at the back, cake stands and stacked books for the levels, and a string of pastel fairy lights round the jars for the evening.
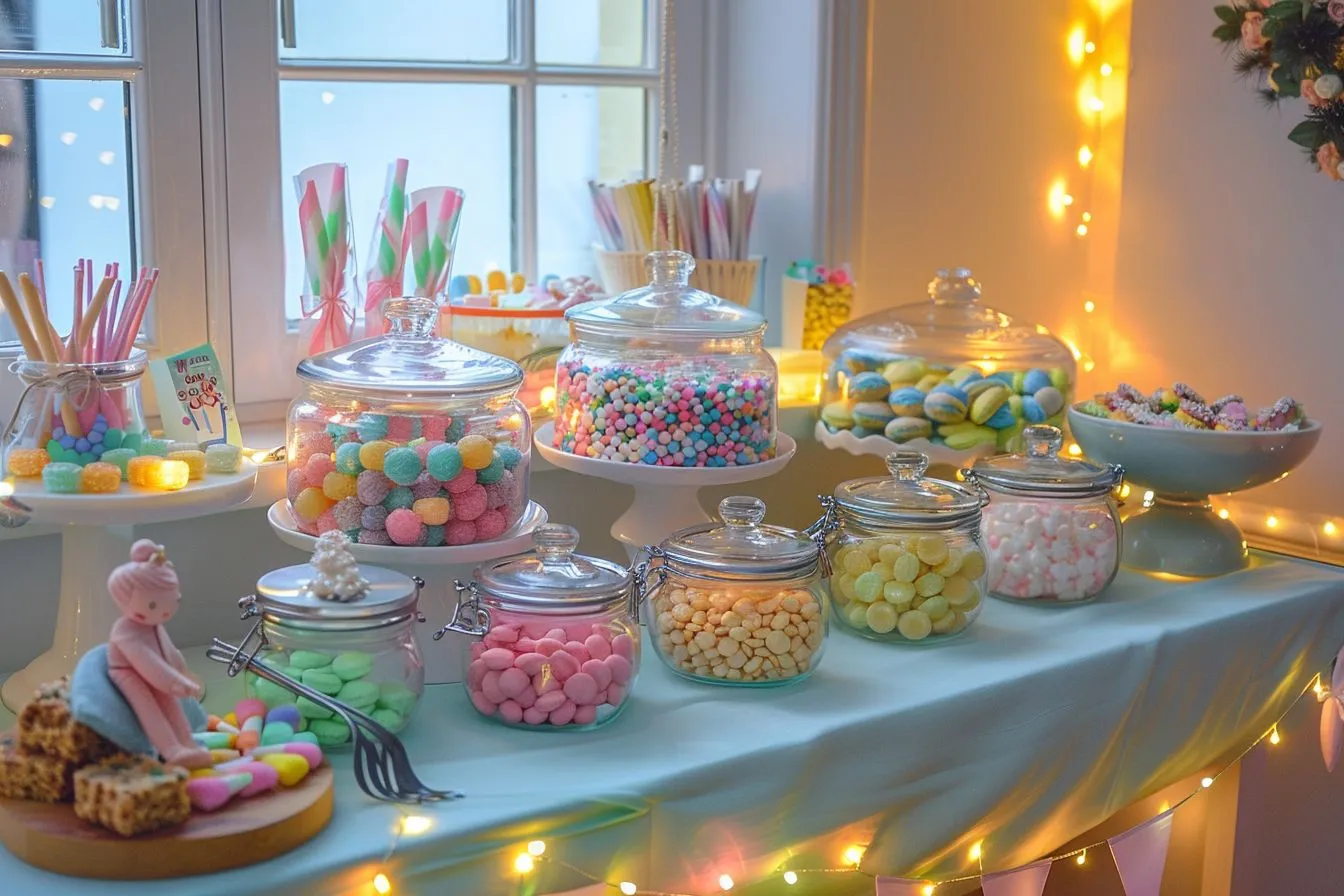
The Honeydukes counter
One sideboard 1 hourWhat you need
- Clear jars, bowls and apothecary containers, mixed heights
- Candy: wrapped and loose, in colours
- Printed Honeydukes sign and labels on sticker paper
- A pastel tablecloth or wrapping paper
- A tiered stand, crates or books for height
- Small tongs and scoops, cellophane bags and ties
- Pastel paper bunting and pastel fairy lights
Steps
- Cover the surface with the pastel paper and put the Honeydukes sign at the centre or on the wall behind.
- Arrange the jars tallest at the back on the risers, one candy per jar, and label each.
- Put tongs or a scoop in every jar and the bags and ties at one end.
- Add a plate or two of homemade sweets between the jars.
- Hang the bunting along the front; wind the fairy lights round the jars.
9. The potions bar
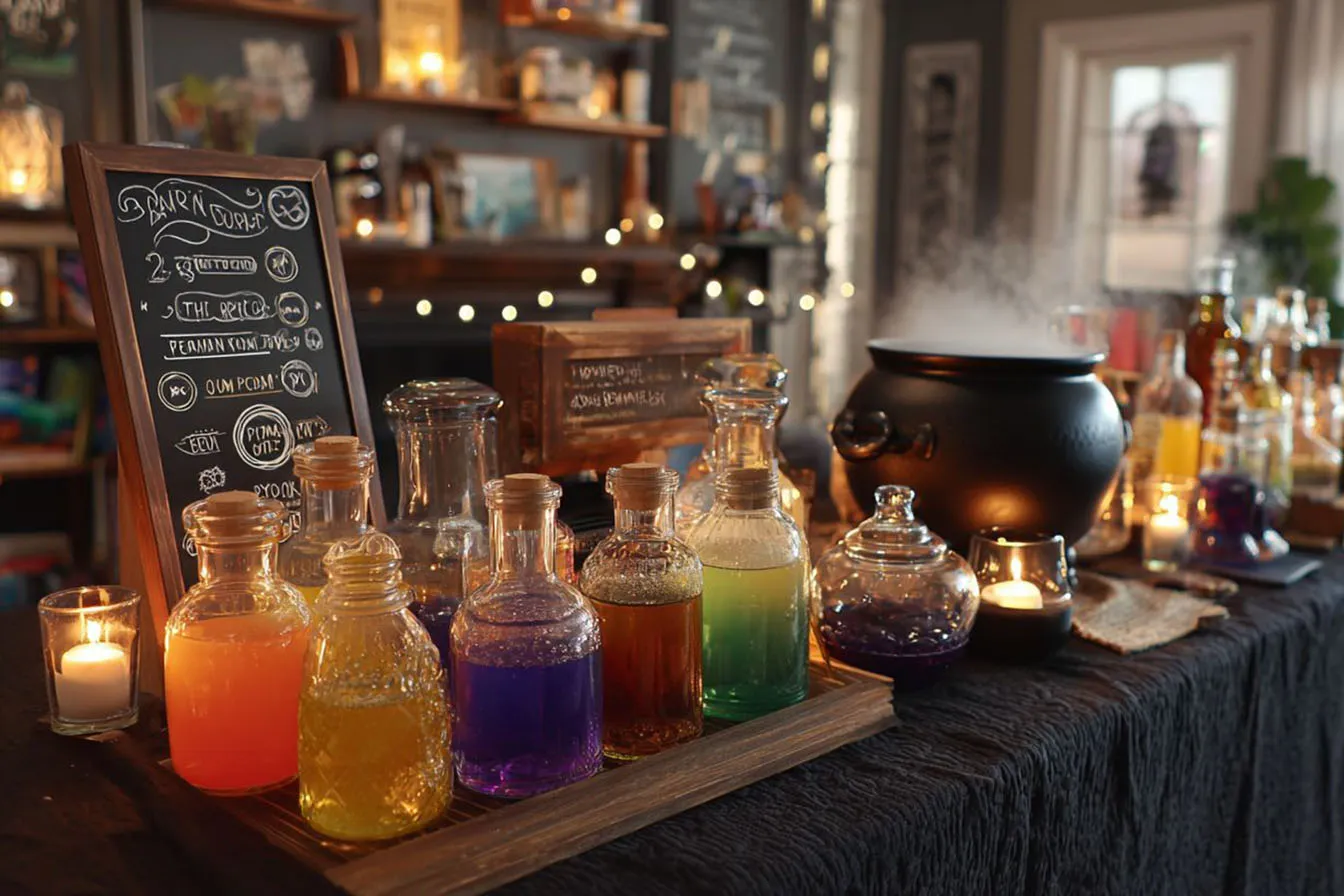
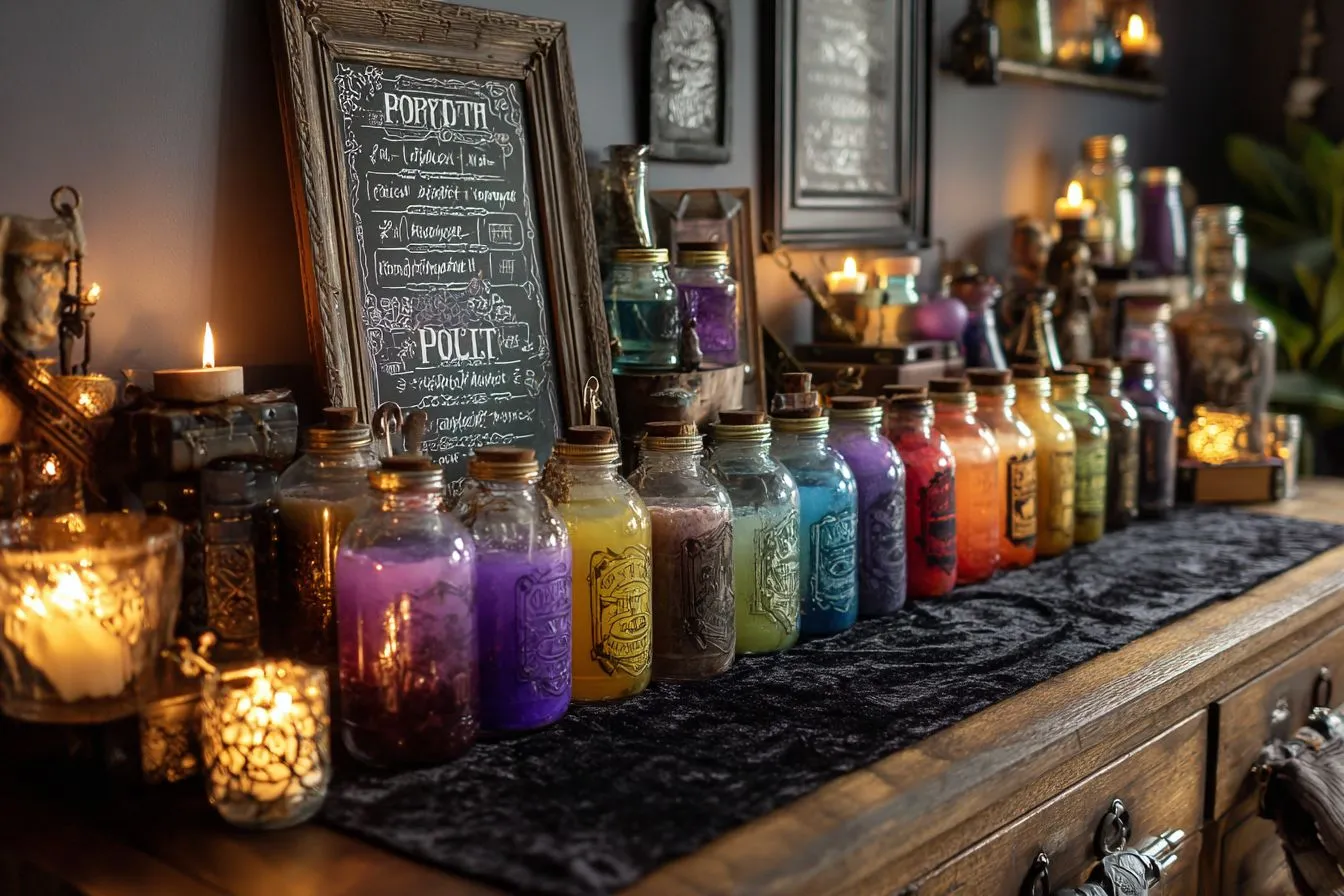
The kitchen island under a black tablecloth: thrift-store bottles filled with water and food colouring, tea-stained labels (Felix Felicis, Polyjuice, Amortentia), LED tea lights behind the bottles so they glow, a plastic cauldron in the middle with a mist maker in it, and the real drinks in dispensers with magical names on a chalkboard. For a grown-up party this is the bar; for a kids’ party it is where the punch is.
Keep the lights low around it so the bottles do the work; a single desk lamp angled down is enough.
The potions bar
One island 1 hourWhat you need
- A black tablecloth and a purple or green runner
- Assorted glass bottles and jars from the thrift store or the recycling
- Food colouring in green, purple and red
- Printed potion labels on tea-stained paper
- A plastic cauldron, a mist maker or dry ice handled by an adult
- LED tea lights, a chalkboard menu
- Drink dispensers or pitchers for the real drinks
Steps
- Cover the island in black with the coloured runner down the middle.
- Fill the bottles with tinted water, label them, and stand LED tea lights behind them.
- Put the cauldron in the centre with the mist maker inside and small bottles and goblets around it.
- Set the real drinks in dispensers and write them on the chalkboard with their potion names: the orange punch is Firewhisky, the green soda is Elixir of Euphoria.
- Scatter covered "spell books" and a quill; dim everything around the island.
10. The Divination tower
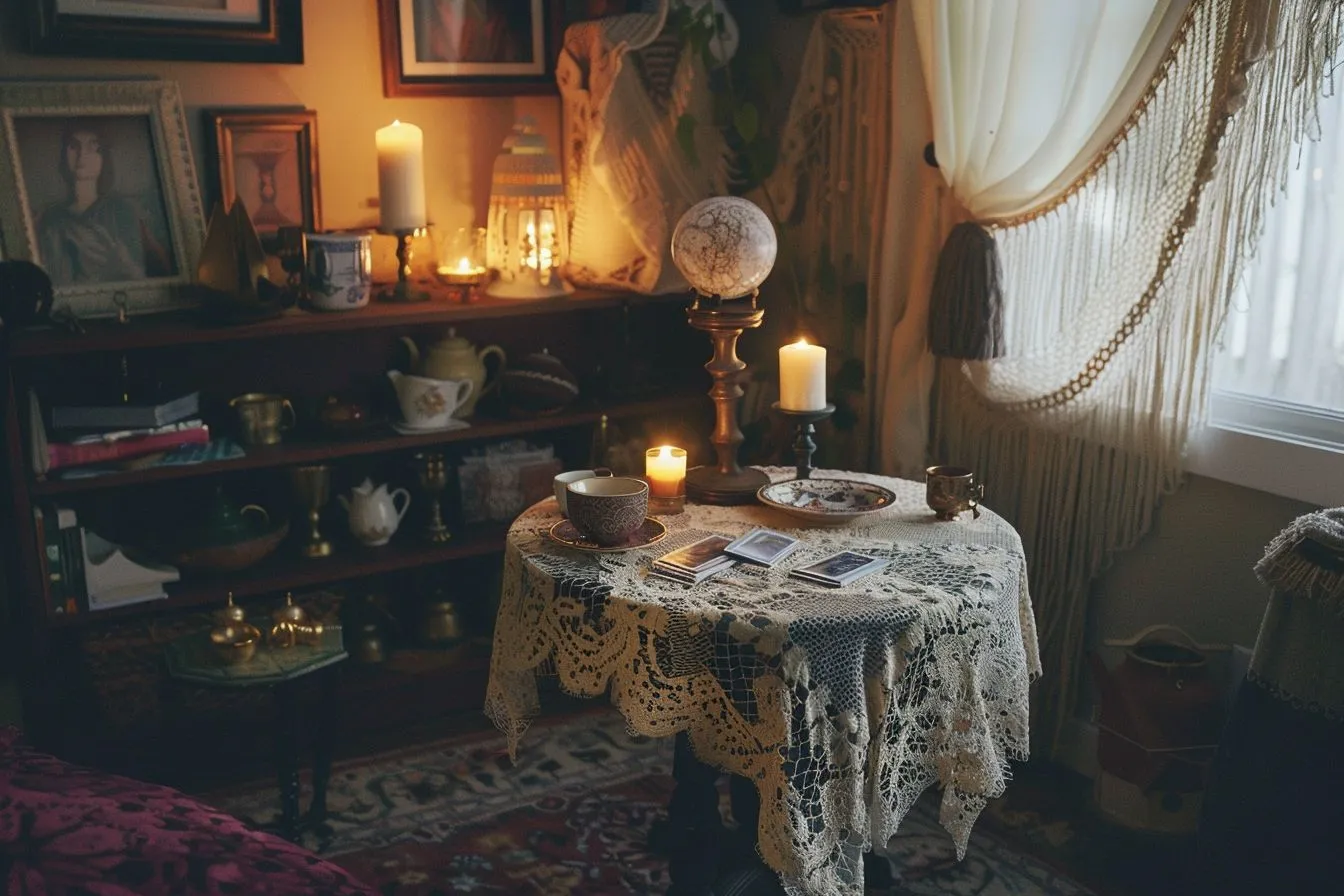
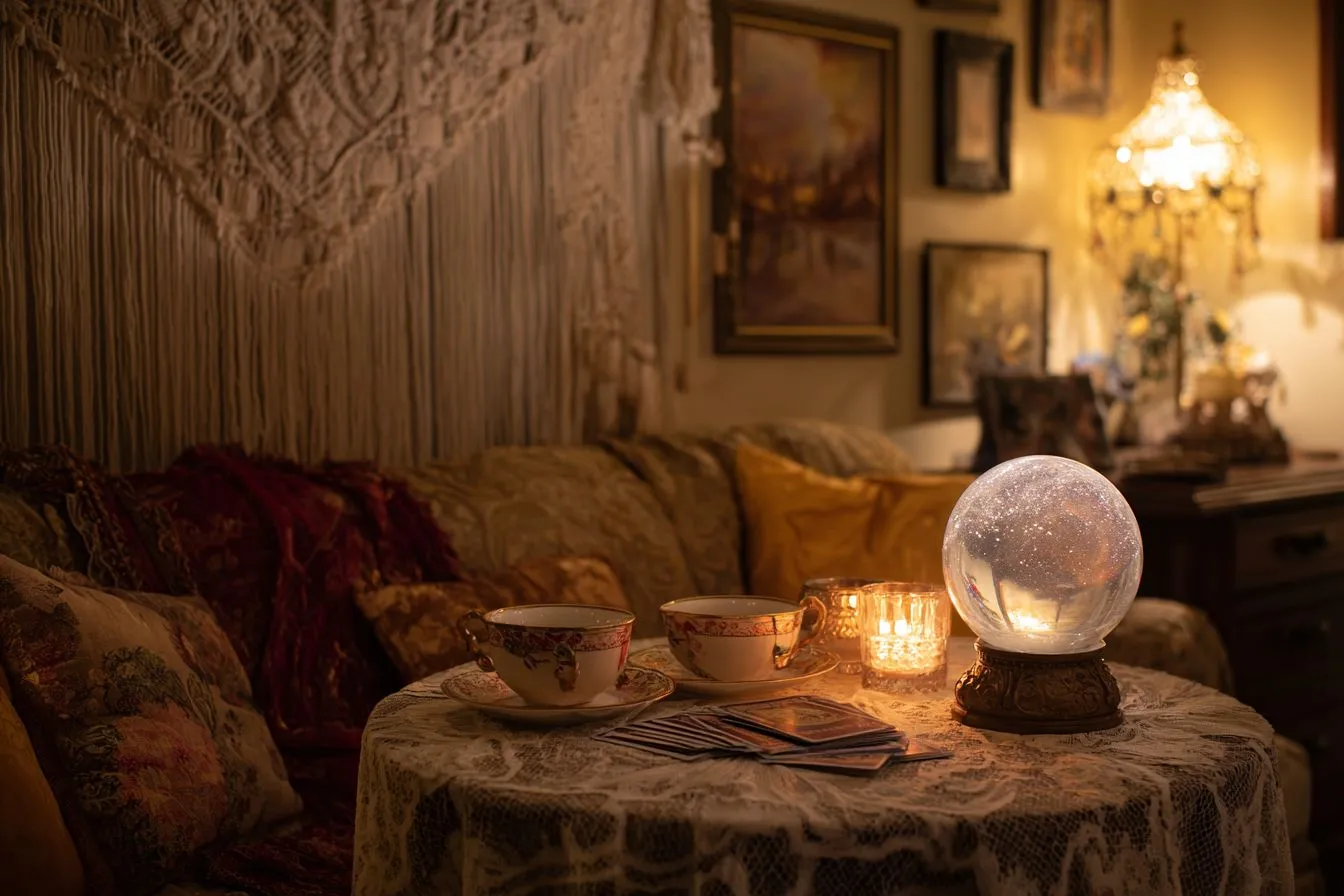
A small round table and two chairs in a quiet corner: a lace or velvet cloth, a fishbowl or a glass globe on a folded scarf as the crystal ball, mismatched teacups with loose tea for readings, a tarot deck, a fringed scarf over the lamp shade and a beaded curtain or a scarf hung behind for privacy. One guest sits, another reads; it runs itself all afternoon, and it is the five-dollar zone.
The lamp with the scarf over its shade is the whole lighting plan; keep the bulb LED and the scarf clear of it.
The Divination tower
One small table 30 minutesWhat you need
- A small round table and two chairs
- A lace or velvet cloth, layered
- A fishbowl or glass globe lamp cover for the crystal ball, on a scarf
- Mismatched teacups and saucers, loose-leaf tea
- A tarot deck or a printable one
- A lamp with a fringed scarf over the shade, LED candles
- A fringed scarf or beaded curtain for the backdrop
- Small bottles labelled Essence of Prophecy, a notebook of "predictions"
Steps
- Drape the table in layers and set the crystal ball in the centre on the folded scarf, an LED candle under it if the stand allows.
- Lay out the tarot on one side, the teacups and the bowl of tea on the other.
- Hang the scarf or curtain behind the table; angle the chairs away from the room.
- Put the scarf over the lamp shade and a fairy-light string along the backdrop.
- Scatter the bottles and the notebook; readings are two minutes each and kind.
11. The Defence Against the Dark Arts wall
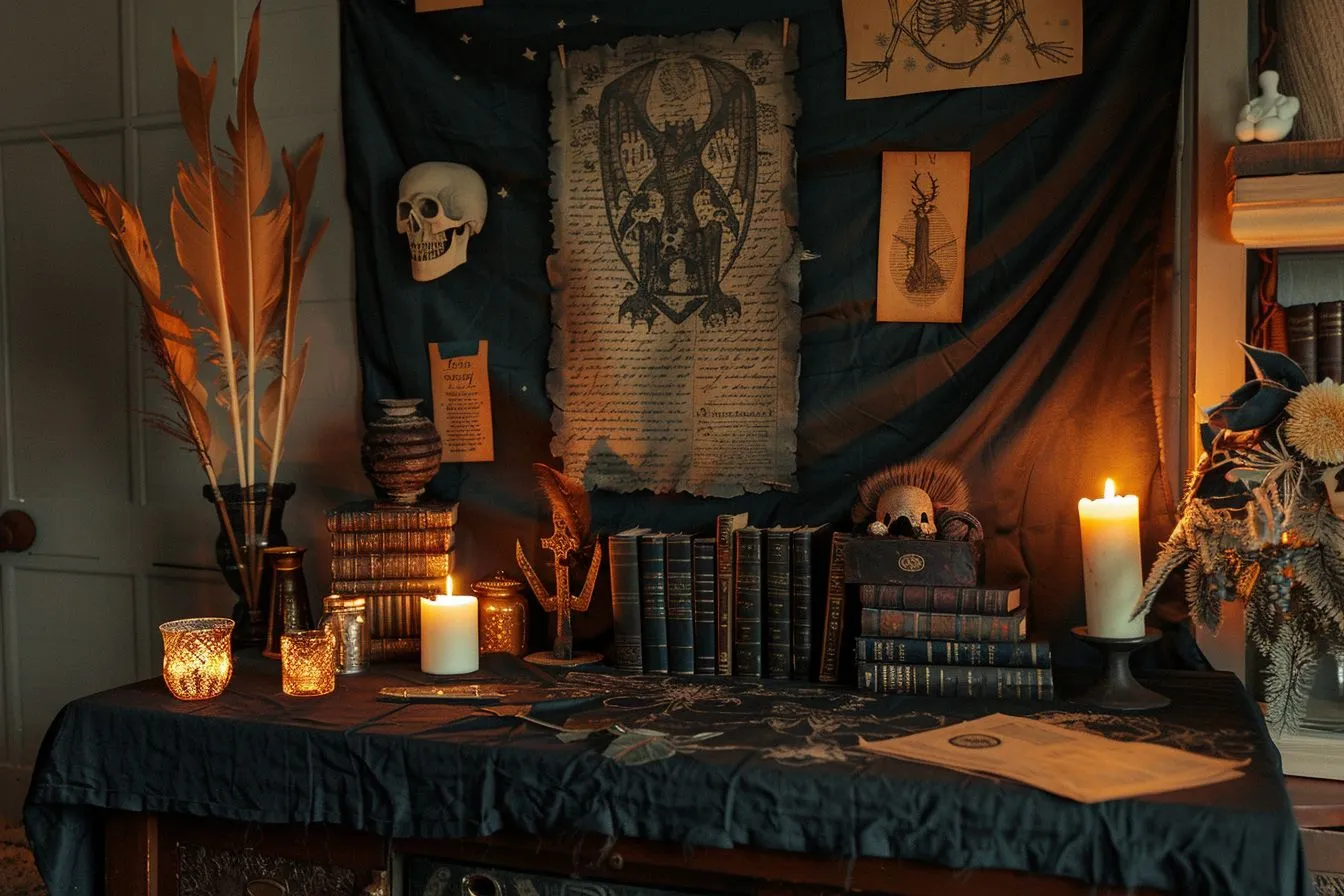
A blank wall, a stretch of hallway or the back of a door hung with dark fabric: creature silhouettes cut from black paper at different heights, tea-stained “lessons” pinned to a corkboard (“Boggart banishment: laughter is key”), old books wrapped in brown paper on the floor, a fake skull and a quill, a clip lamp from above, and a string of wanted posters along the top. A mirror to one side with a “Boggart containment” label above it is the joke the adults get.
It is the display zone: guests read it rather than play in it, so put it where the queue for the bathroom stands.
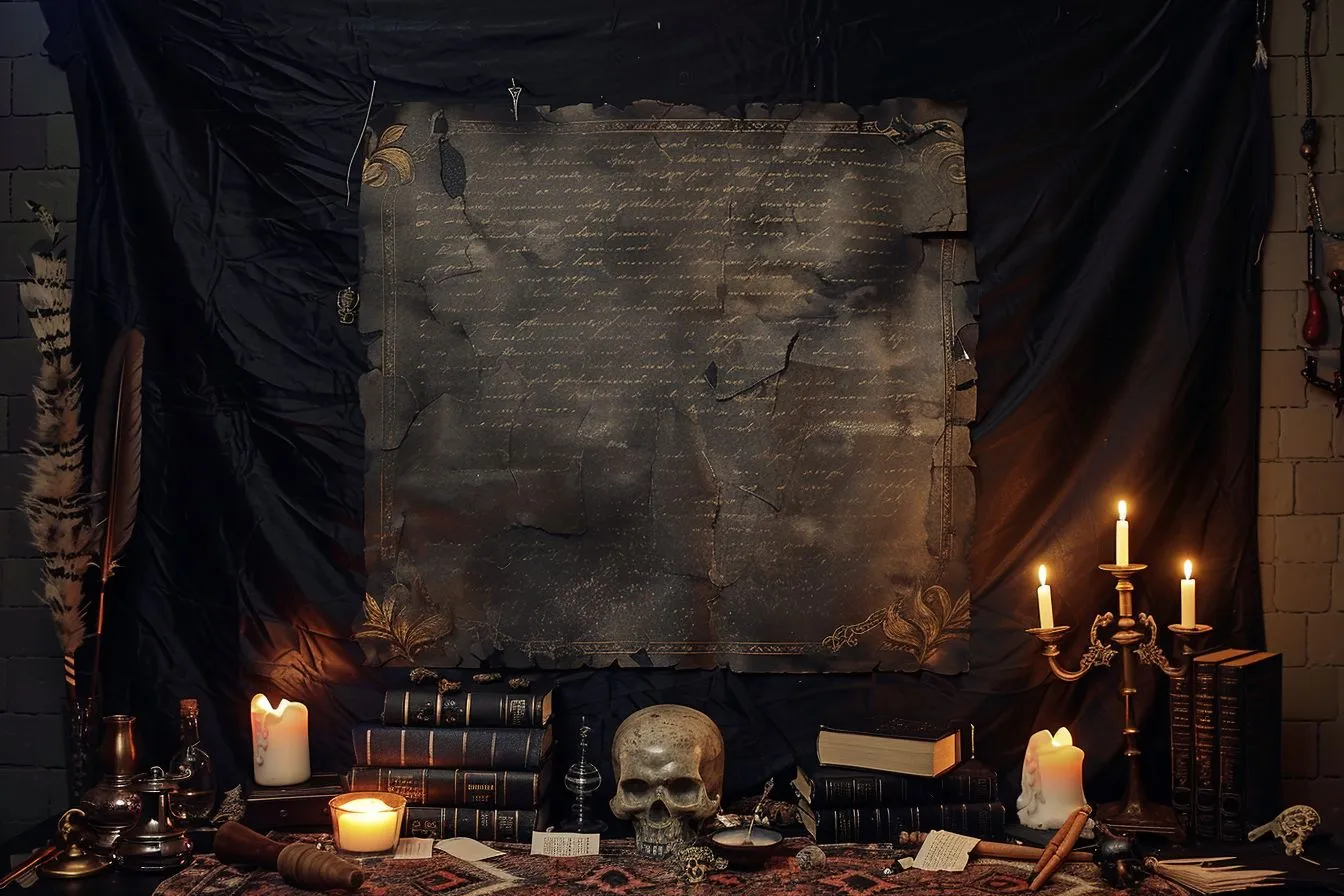
The Defence Against the Dark Arts wall
One wall 1 hourWhat you need
- Black or grey fabric, a curtain or a tapestry
- Black paper for creature silhouettes: a Dementor, a Boggart, a werewolf
- Old books wrapped in brown paper, labelled
- A corkboard or foam board and tea-stained printouts
- A fake skull, a feather quill, a broken wand
- A clip lamp or LED spotlight, one flickering LED candle
- String and mini clips for the wanted posters
Steps
- Hang the fabric over the wall section or tape it round the edges of a door.
- Cut the silhouettes and pin them at different heights, some overlapping the books and props.
- Pin the lessons to the corkboard and hang it in the centre.
- Stack the books along the floor with the skull and the quill on top; the candle on the stack.
- Clip the lamp above, angled down; string the wanted posters along the top.
The same house for a grown-up party
The zones do not change; the light and the palette do. Drop the pastels and the bunting, keep the kraft, the black and the candle gold, double the floating candles, and let the potions bar be a real bar with the cocktails labelled as potions and the alcohol-free ones as antidotes. The Divination table becomes the corner people actually sit in; the Defence wall gets the reading; the Platform 9¾ doorway gets the photos. Music low, one lamp per room, and the Great Hall table set for a proper dinner rather than a buffet.
The buy list and the make list
Buy (one trip, about $60 for five zones): a brick-print plastic tablecloth, a black tablecloth, a roll of kraft paper, a bag of battery tea lights, two strings of warm fairy lights, Command hooks and fishing line, gold-rim plates and goblets, one pack of napkins in each of two house colours, gold spray paint, matte printer paper. Everything else on this page is thrifted, printed or already in the house.
Make (the weekend before): the floating candles, the wands, the mandrake, the creature silhouettes, the tea-stained signs and labels, the crests on card shields. Two evenings with a glue gun.
Questions people ask
How do you make Harry Potter floating candles? Cardboard tubes cut to different lengths, hot-glue drips for the wax, white paint, a battery tea light dropped in, fishing line through two holes under the rim, hung from clear hooks at staggered heights. The card above has the steps; a dozen takes an afternoon.
How do you hang floating candles without damaging the ceiling? Clear Command hooks, or clear push pins in a textured ceiling; the candles weigh almost nothing. Hang the lowest about seven feet up.
What are the cheapest Harry Potter party decorations? Kraft paper, a printer, tea for staining, and the recycling bin: the floating candles, the wands, the letters and the labels are nearly free. The one thing worth buying is the brick-print tablecloth, because it makes two zones (the platform and the corridor arch).
What colours are Harry Potter decorations? Kraft brown, black and gold as the base, with one or two house colours as accents: red and gold, green and silver, blue and bronze, yellow and black. Four houses in one room reads as a party store; two reads as a house.
Where do I buy Harry Potter decorations? The party aisle and Amazon for the brick tablecloth, the plates and the round sign; the dollar store for lights, jars and frames; the thrift store for candle holders, bottles and books. Official licensed sets exist and cost more than this whole page.
More for the party
- Twenty Harry Potter snacks and treats for the Honeydukes counter.
- Harry Potter birthday cake ideas for the Great Hall table.
- Harry Potter party activities for the zones that need a game.
- Every Harry Potter post on this site.
Pin this for party day
Save it to a Pinterest board and it will be there when the party is.
Save to Pinterest