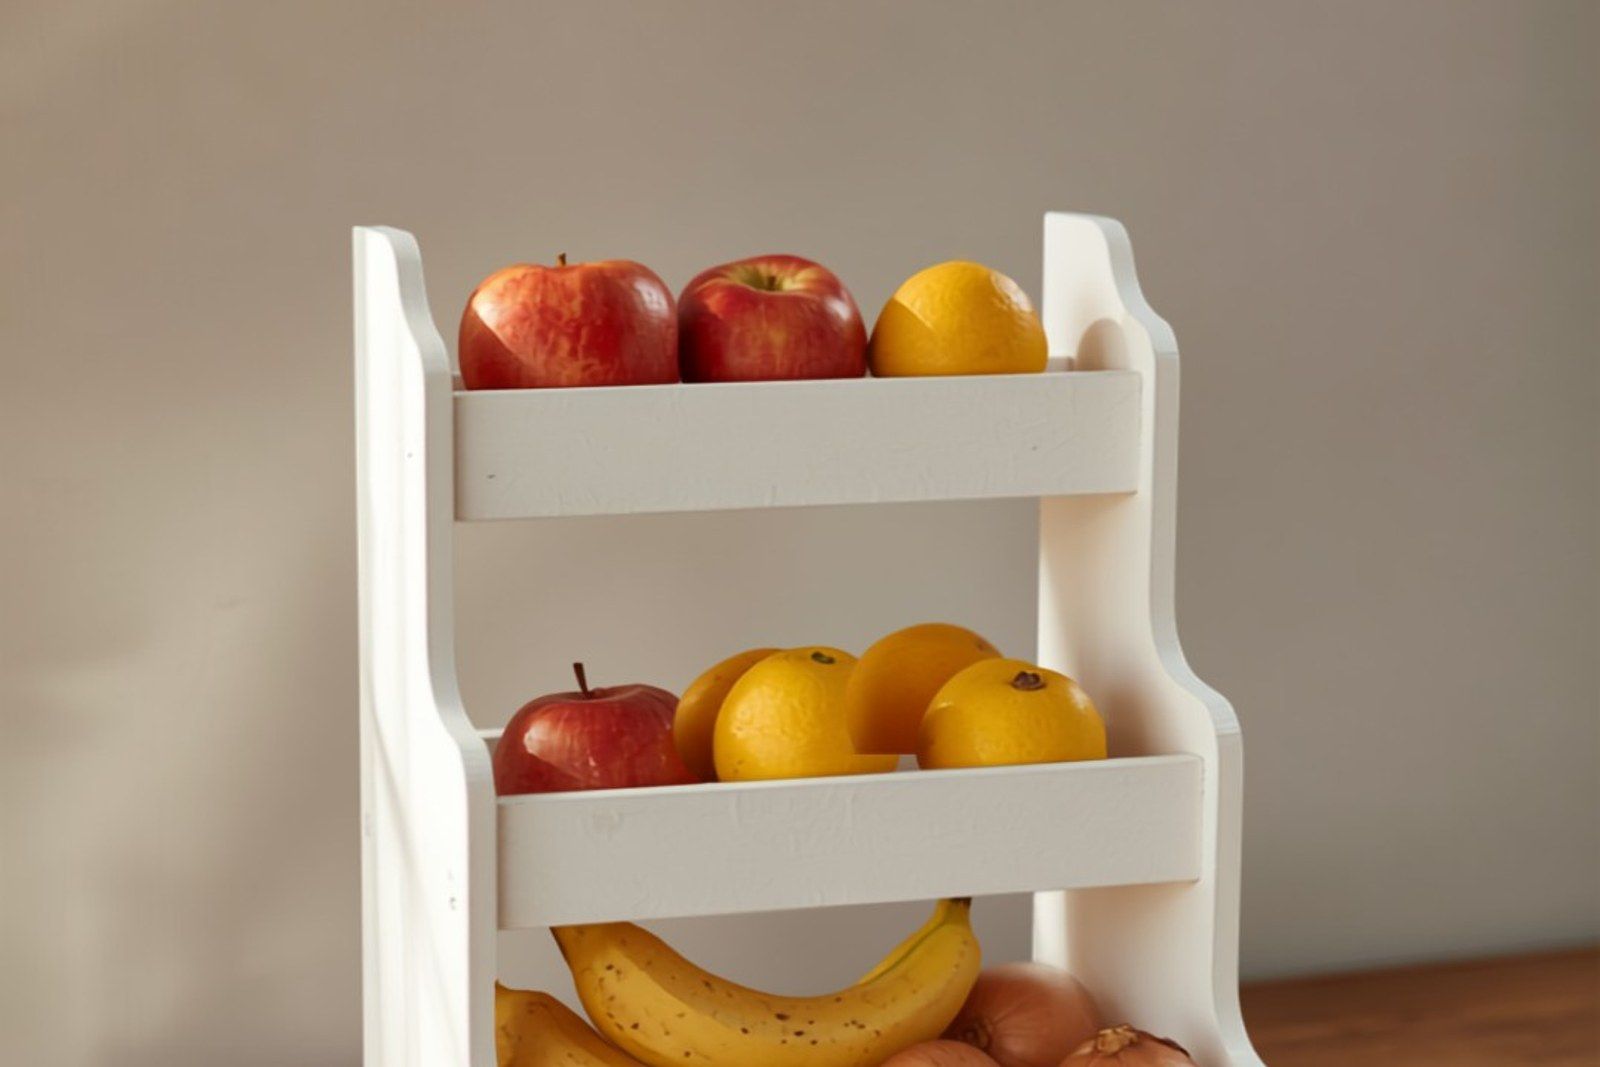
I am so excited to share this project with you. And I am proud to say I did this project all on my own, from plan to building it, all by my she-self! This is a one board project too so it’s not going to be over the top expensive. I really hope this inspires you to build something! You may have seen this project over on Creative Ramblings, it was my first post as a contributor on Sarah’s blog. Here we go: how I made a DIY Produce Stand with one board. This all started when I started snooping around my parent’s garage and I spotted these pot holders for railings. They had 3 of these guys that had never been used and still had the price tag on them. Of course I asked if I could have them oh so sweetly as I was already headed to put them in the car. The pot holders are wrought iron with a vinyl coating.
What you need:
Material List: One 8 ft 1×3 board, One 1 1/2 inch diameter dowel rod (such as a closet rod), 3 pot holders, screws, paint (optional) (Note: I found a 1×3 in our scraps, you can’t buy it this size. You can cut a 1×4 or large board down or just use a 1×4 for this project.
Tool list: Saw, drill, forstner bit same size as dowel, square, tape measure, pencil, clamps, router (optional)
Cut list: Two pieces both 35.5 inches. Two pieces 12.5 inches. Cut dowel into three 10 inch sections
Cutting:
Ok, let’s begin. Grab your board, measure and mark 35. 5 inches with your tape measure and square. Did you know you can use your square to help you make a straight cut with the saw. Once you have your saw lined up on your mark place the square against the saw and hold against the board. Repeat this to cut a second piece 35.5 inches and two pieces at 12.5 inches.
Cut the dowel into 10 inch sections using the saw and square as your guide.
Another way to use the square is to mark lines down a board, for instance we need to find the center of this board and mark it. Find the notch at appropriate measurement, place your pencil in the notch and slowly pull the square down the board making sure the edge of the square stays against the edge of your board. Mark the center of both longer pieces, this will help with hole placement. Using the square again and your tape measure mark 1 inch from the top of the board, which is where the top of the hole will be for the first rung. From that first mark measure down 1 1/2 inch to mark the bottom of the hole, measure and make a 3rd mark in the center of those 2 marks. This is important to find the center for drilling the holes.
You’re ready for holes. You won’t be drilling all the way through the board so it’s a good idea to place the forstner bit beside the board and making a mark with a permanent marker or tape or just making a mental note where on the forstner bit to stop.
Drill out all three holes on the marks created earlier. The indention in the middle of the hole from the bit is a good way to transfer the center mark to the other side.
Use the indentation left from the bit to create pilot holes for assembly. Find a drill bit about the same size as the indention. That sure beats trying to find the center of the hole right?
Using a router with a 1/8 inch round over bit go over all of the edges. This will just smooth over the edges. This step is optional!!!
Now that you have everything cut and the last thing to do before assembly is to sand it all down to prepare the wood for paint. It’s easier to sand the individual pieces than to sand once it’s assembled.
Let’s put it all together. Place one board on a flat surface with the holes up. Place all 3 dowels into the holes. Now line up the other board over the dowels. This was a little tricky and would have been a little easier with an extra hand so believe me when I say use clamps to hold it all together once you get the dowels in the holes on both boards.
In all of the pilot holes you made earlier add screws through the side pieces into the dowels, do this for all 6 holes, 3 on each side.
To add the feet, find and mark the center of each “foot.” Also mark the center of the outside of each side piece near the bottom. Line up these marks and make sure the bottom of the foot is flush with the side piece. Clamp to hold the foot together while you add screws. Do the same for both sides.
Done! Well the building part is done. I opted to spray paint my produce stand white. You could leave it as is, stain it or paint it any color you like.
Add your baskets, fill with fruits and veggies. You could add basket liners or flower pots to keep smaller items from falling out.
I think it fits in nicely in our kitchen right by the Menu board and Command Center.
It’s totally do-able right? What? You don’t have a use for a produce stand? I think this piece is versatile that it could organize a variety of items in your home. What would you use it for?
Thanks for stopping by At Home with Sweet T!
-Tracy
Pin this for party day
Save it to a Pinterest board and it will be there when the party is.
Save to Pinterest